Creating Automated MailChimp Sign-up Discounts with WooCommerce
Email lists can be an effective form of marketing, even with the latest restrictions imposed by iOS 15. The conversion rates are not to be ignored especially given the opportunity cost of embarking on email marketing. A question does arise however, how does one get people to sign up for marketing emails? One common tactic is to provide a discount code upon subscription to the email list. Luckily there is an automated freemium plugin integration for WooCommerce which offers exactly that option without compromising on the free version.
Automated Mailchimp Discounts with WooCommerce
Step One: Login to Admin Dashboard
First, login to the back end of the WordPress site as an admin or other role with the proper privileges.
Step Two: Navigate to Plugins
Next, on the left hand side of the admin dashboard select Plugins > Add New to add the plugin responsible for this discount newsletter integration.

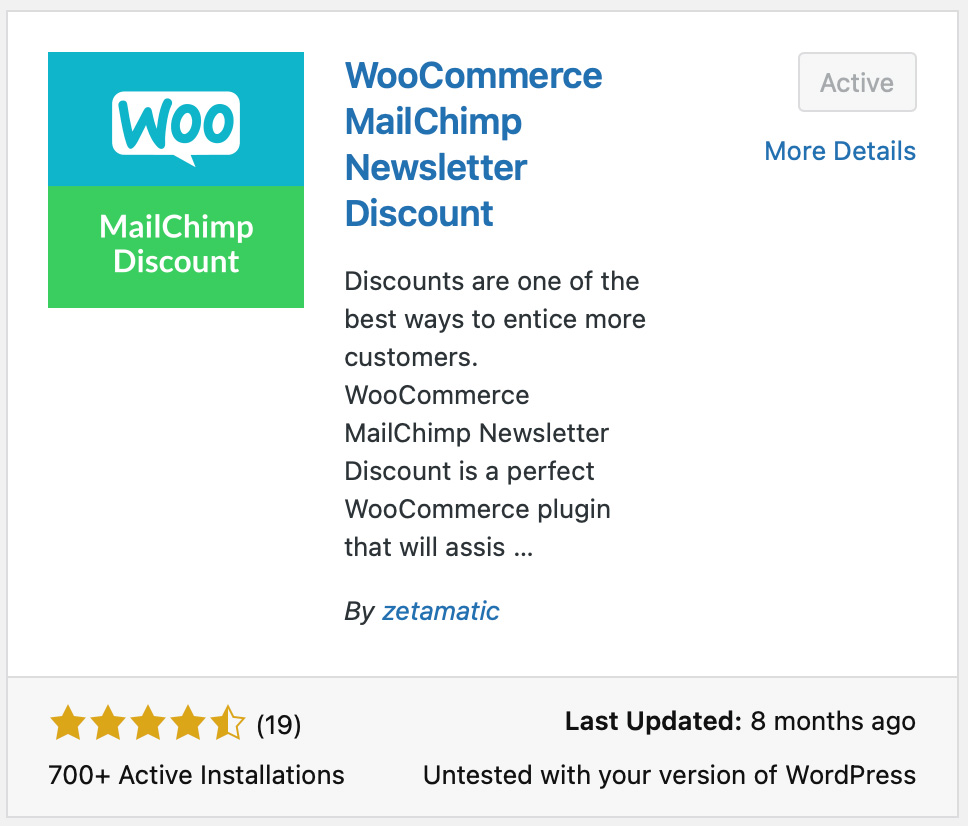
Step Three: Install WooCommerce MailChimp Newsletter Discount
Once the window loads, search for the plugin titled “WooCommerce MailChimp Newsletter Discount” by zetamatic. Install the plugin that appears and activate it once the plugin finishes installing.
Step Four: Login to MailChimp
Open a new tab and login to the MailChimp account that needs to be integrated with this website.

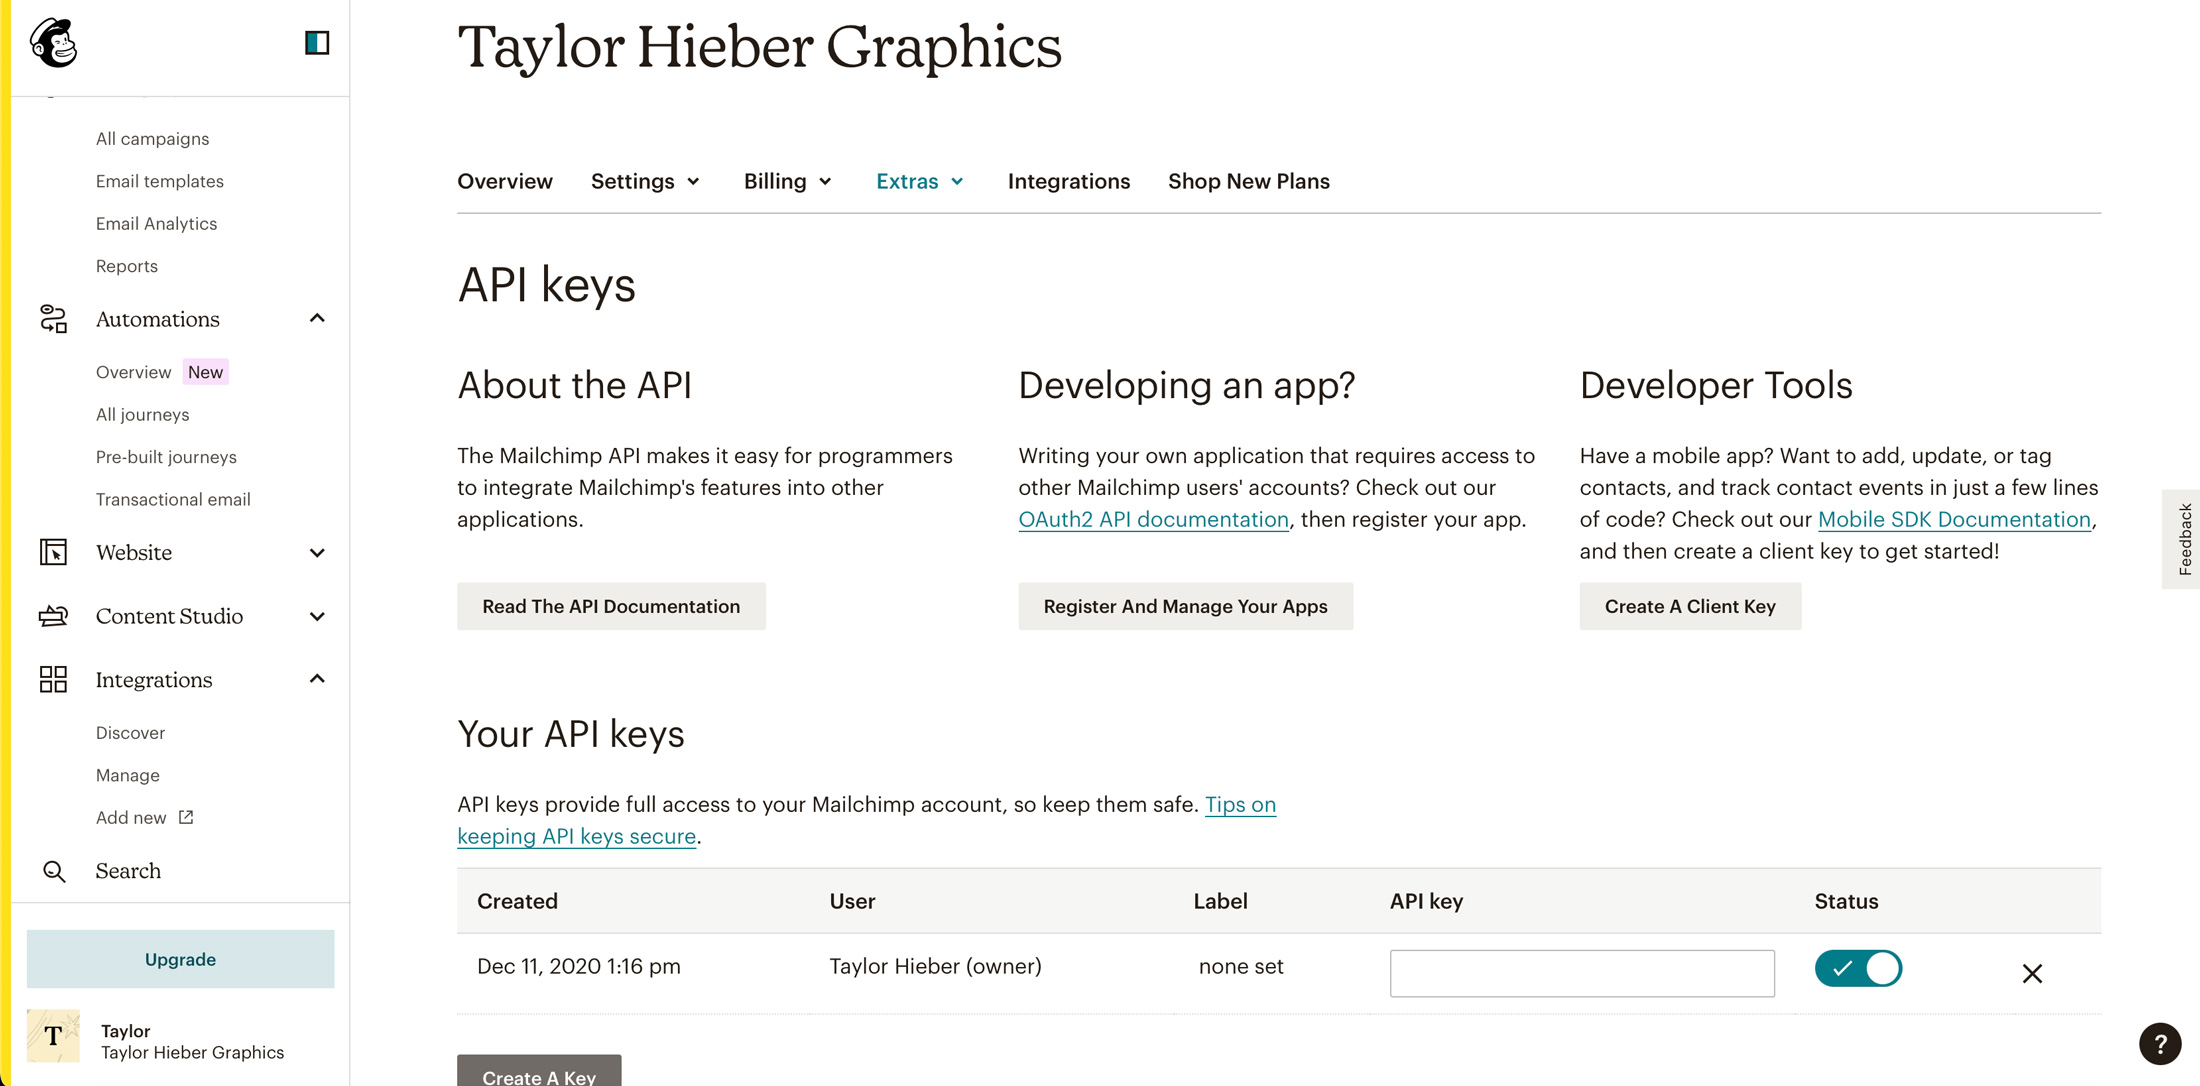
Step Five: Generate an API Key
Once logged in navigate to the bottom left and select the account circle followed by Account. A new window should load up from which navigate to Extras > API Keys. Upon selection another new window shall appear with all API keys currently enabled for this account. If none are created for the website, go ahead and generate one now. An API Key will be generated that will need to be copied to be used with this plugin.
Step Six: Integrate the API Key with the Plugin
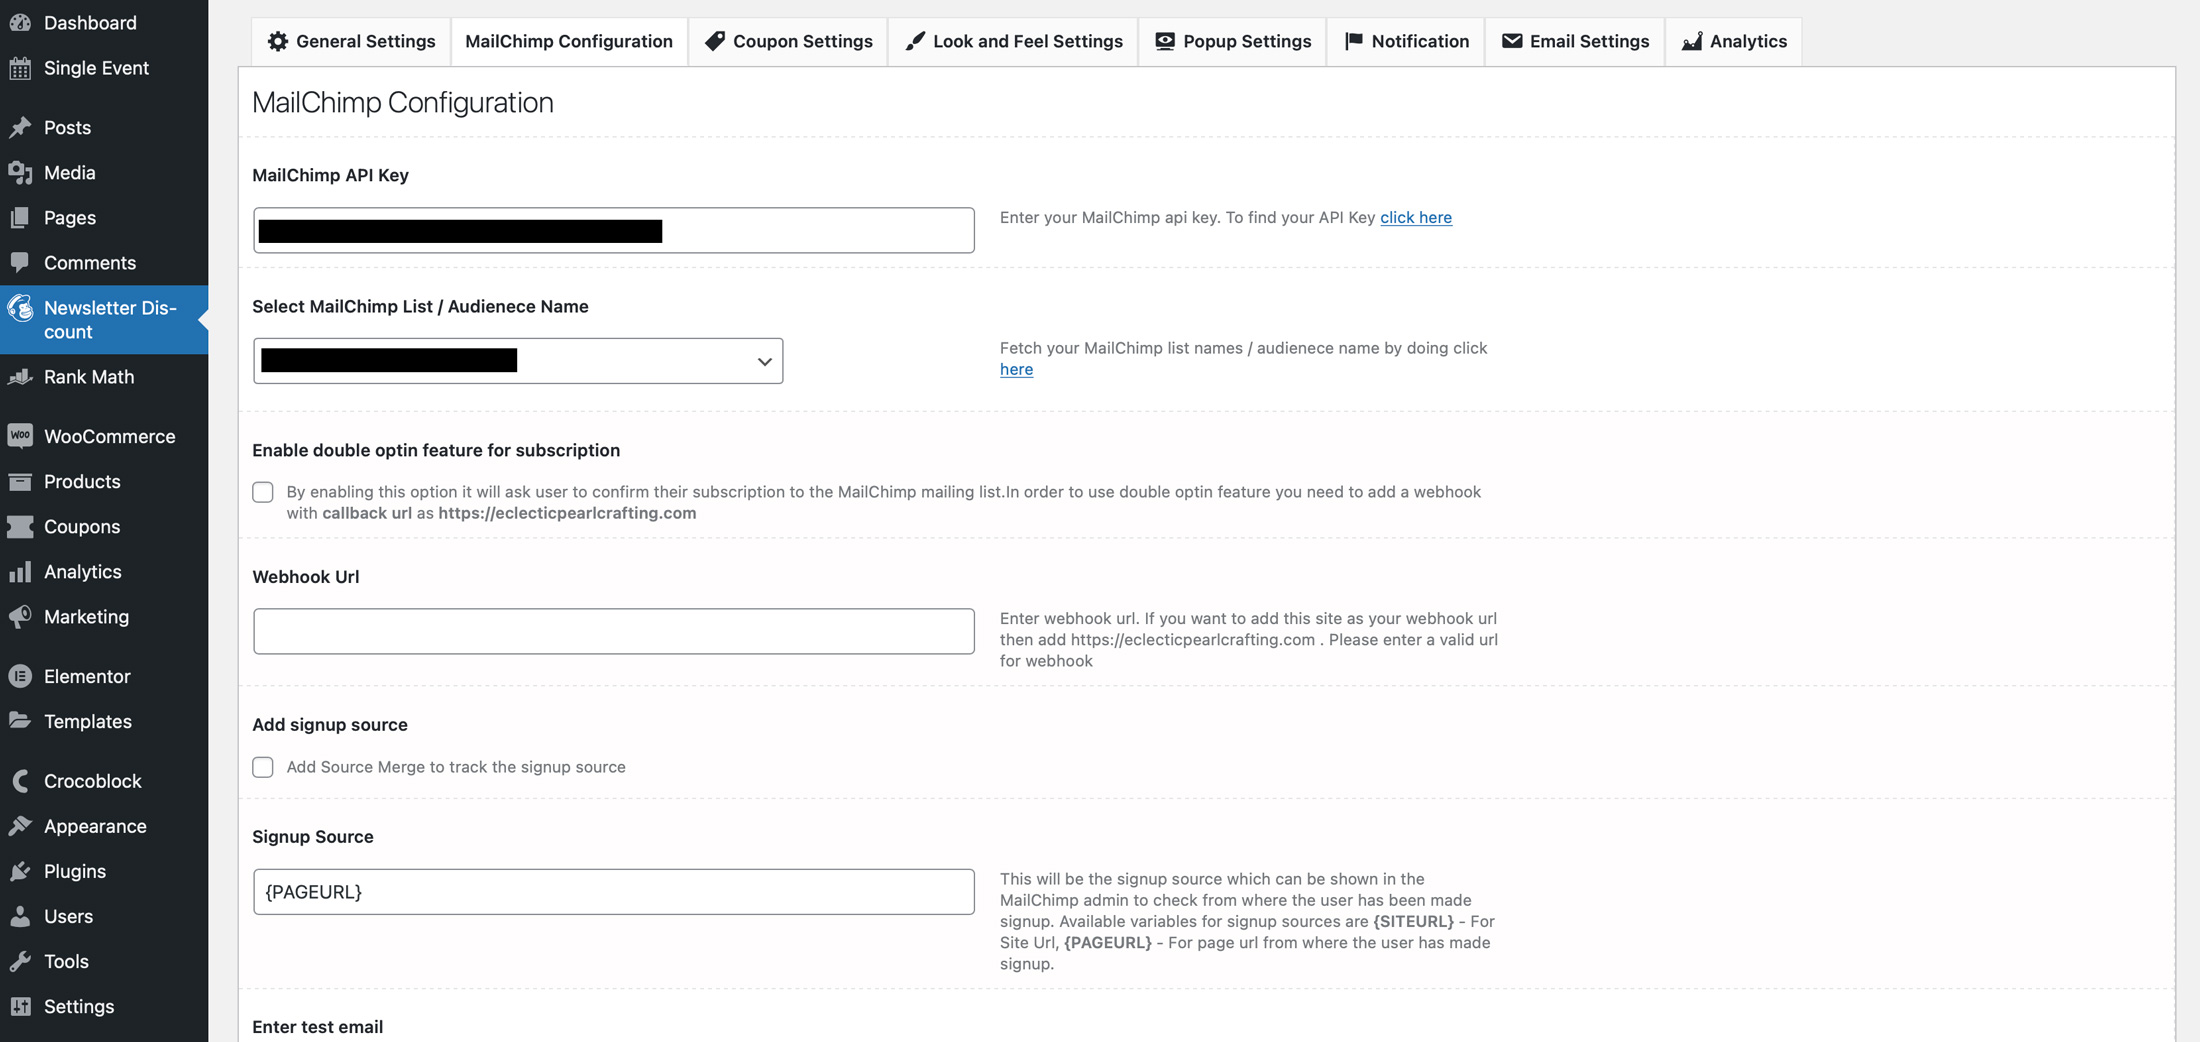
Now that the key is copied into the clipboard, return to the WooCommerce site and select the Newsletter Discount from the left hand side. From there, select the MailChimp configuration and load in the API key and then sync/save settings after selecting the list to input addresses into.
Step Seven: Configure MailChimp Newsletter Discounts
Configuring MailChimp Newsletter Discounts is simple enough to follow along with however there is a list of settings that we will break down.
General Settings
These options allow users to activate the plugin, which should be checked as well as customize the display fields and whether to disable the coupon function entirely.
MailChimp Configuration
Most of the pertinent settings were already discussed in the previous step however developers have the option of sending a test email. If the Pro version of this plugin is in use then developers can customize the integration further by adding terms and conditions, etc.
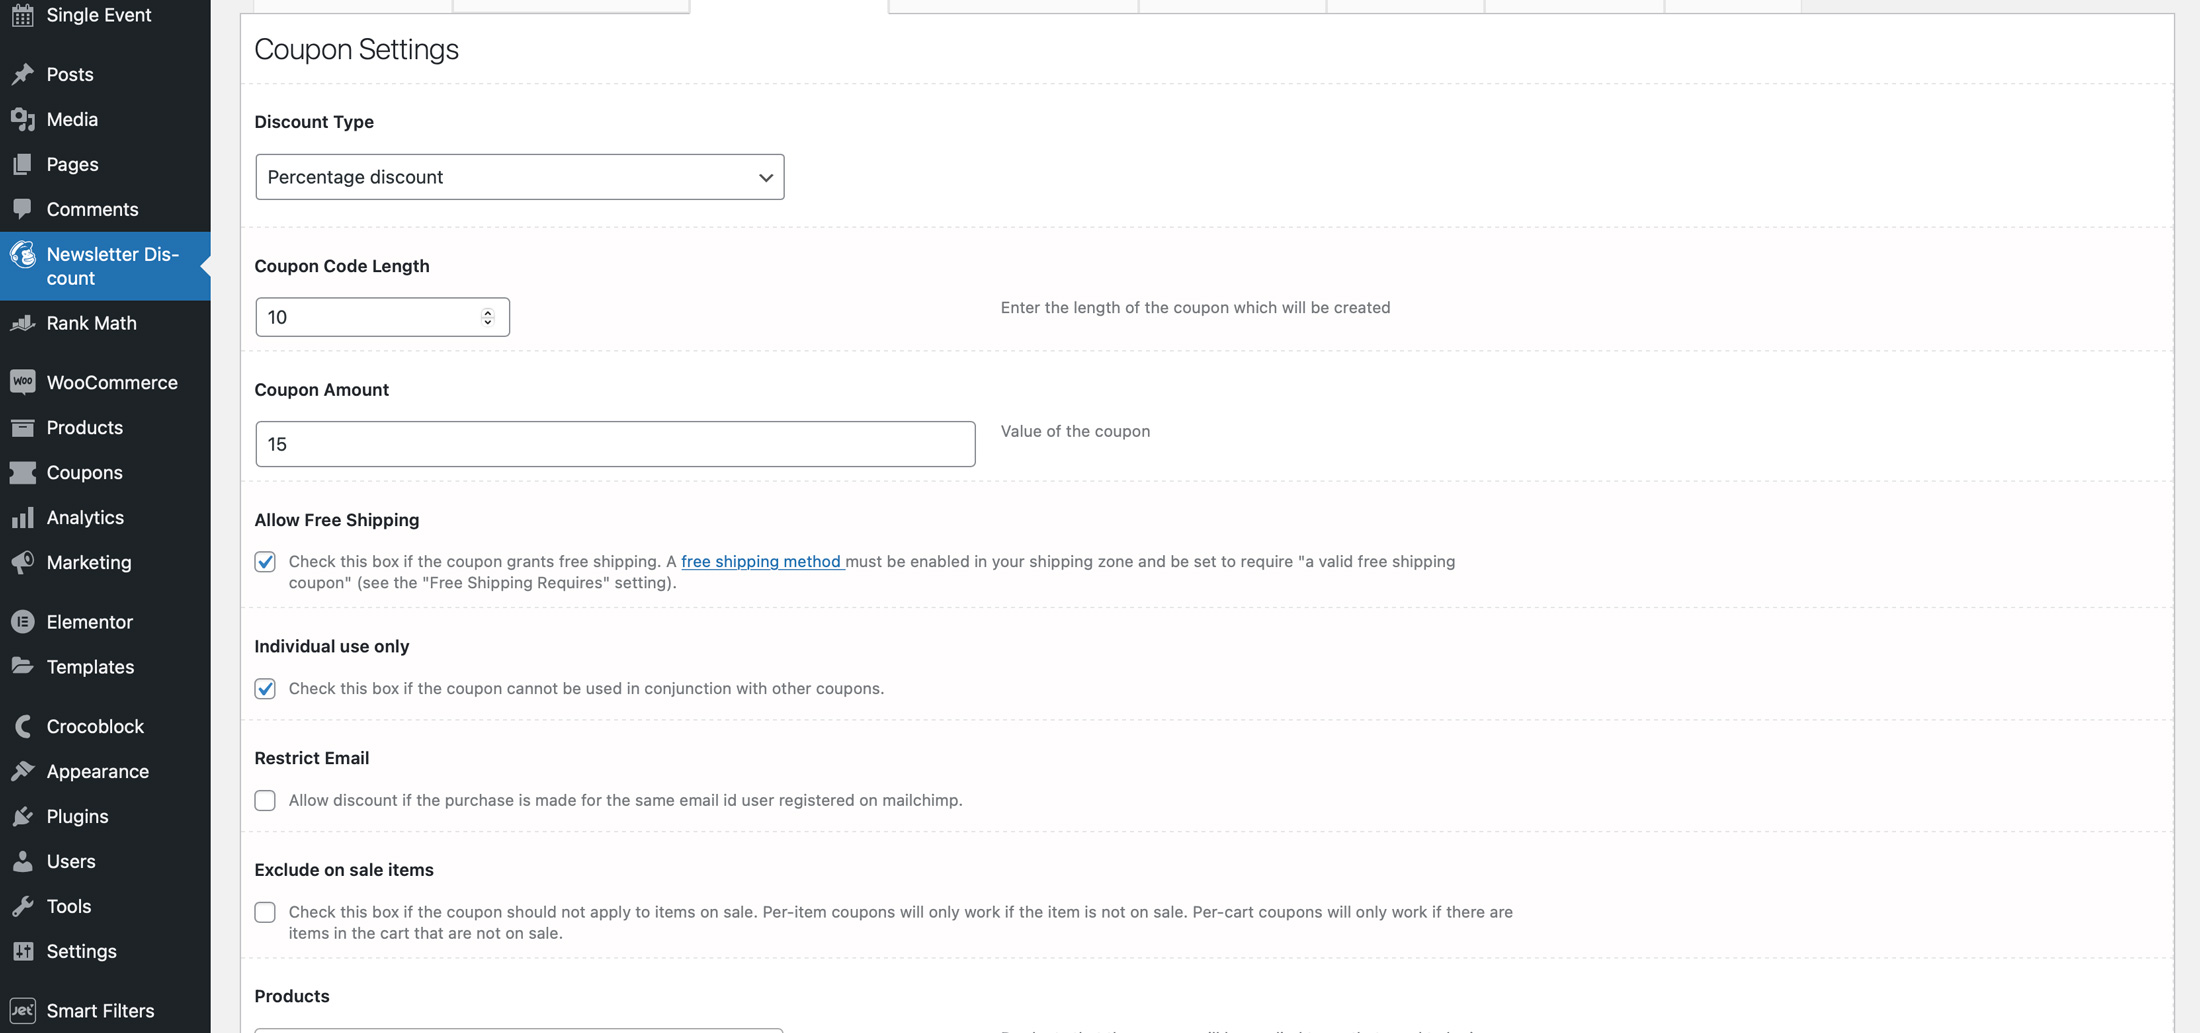
Coupon Settings
Under coupon settings developers can customize what kind of coupon as well as the amount, minimum and maximum purchases, products and categories etc. By default these coupons are only valid for 10 days. With the pro version however these settings can be tweaked as well as exclusions specified, emails, and exclusion of sale items.
Look and Feel Settings
These settings allow developers to customize how the forms appear on the site in facets such as the subscribe button label, color of text, etc. with pro users being able to customize success messages and backgrounds for various states.
Popup Settings (Pro Feature)
Another set of features hidden behind the paywall is the ability for developers to configure a frontend pop-up subscription form. Various items can be configured such as the animation, width and height, conditional rendering, background, colors, etc.
Notification (Pro Feature)
A pro exclusive feature is a desktop notification to appear whenever someone subscribes to the mailing list, complete with notification message, icon, and even sound.
Email Settings
Developers can customize both the from email address and the actual email message sent to the end user within the free version of the plugin. Upon upgrading, developers may customize items such as the subject, name associated with the email, etc.
Analytics (Pro Feature)
Allows for pro users to see analytics on when users of the site subscribe to the mailing list.
Step Eight: Add the Widget
Finally, add in the necessary widgets and elements to the pages, footers, and other such areas that require a signup form. In this instance we’re using elementor so the shortcode is added via the text editor.

Conclusion
Having the ability to automatically generate and send out discount codes via email to new subscribers is an invaluable marketing tool. Not only does this cut down on the headaches but also works to generate sales. Email marketing may be facing its trials and tribulations, however that’s no excuse to not try. Email marketing is easy to set up and keep customers informed on a consistent basis while staying top of mind. Just because customers aren’t willing to purchase today doesn’t mean it’s a failed attempt. If you’re new to email marketing with MailChimp check out our other article, learn how to create MailChimp emails that convert and How to Create an Email Marketing Campaign Strategy.


