How to Save a JPEG in Photoshop with Save a Copy or Legacy Save As
In the May 2021 release of Adobe Photoshop, Adobe made a controversial and interesting move to change how saving files works with the Save As command. In version 22.4, a feature was introduced called Save a Copy which adds another step to saving a JPEG. Adobe’s reasoning for this is that the available options for Save As maintain the integrity of the work (layer editing abilities) and Save a Copy includes formats that may remove the ability to edit the layers and is a flattened file.
Reverting to Legacy Saving
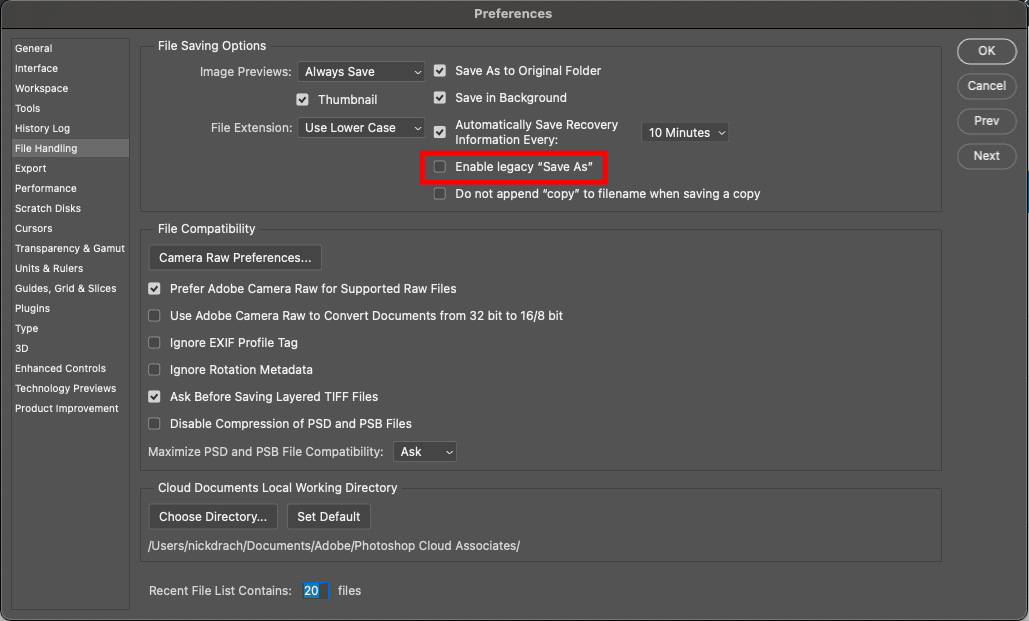
If users wish to go back to the legacy Save As, Adobe offers this option on version 22.4.2 (after some poor feedback). To do this simply go to the preferences window, either (macOS) Photoshop > Preferences > File Handling > File Saving Options, or (Windows) Edit > Preferences > File Handling > File Saving Options. Once in this window, an option will be available labeled Enable legacy “Save As”. On a macOS machine the appending of copy to the end of saving will always be enabled as long as the legacy system is in place. With windows however, this option may be disabled separately with the option underneath the previously mentioned. This will return the legacy saving workflow as users before this update knew it. Even if Save A Copy is still an option, the legacy settings will still be presented.
Updated Saving Workflow
There are two methods of Saving a Copy of the file.
Method 1: Direct Saving of a Copy
This method uses the new feature accessed directly from the toolbar.
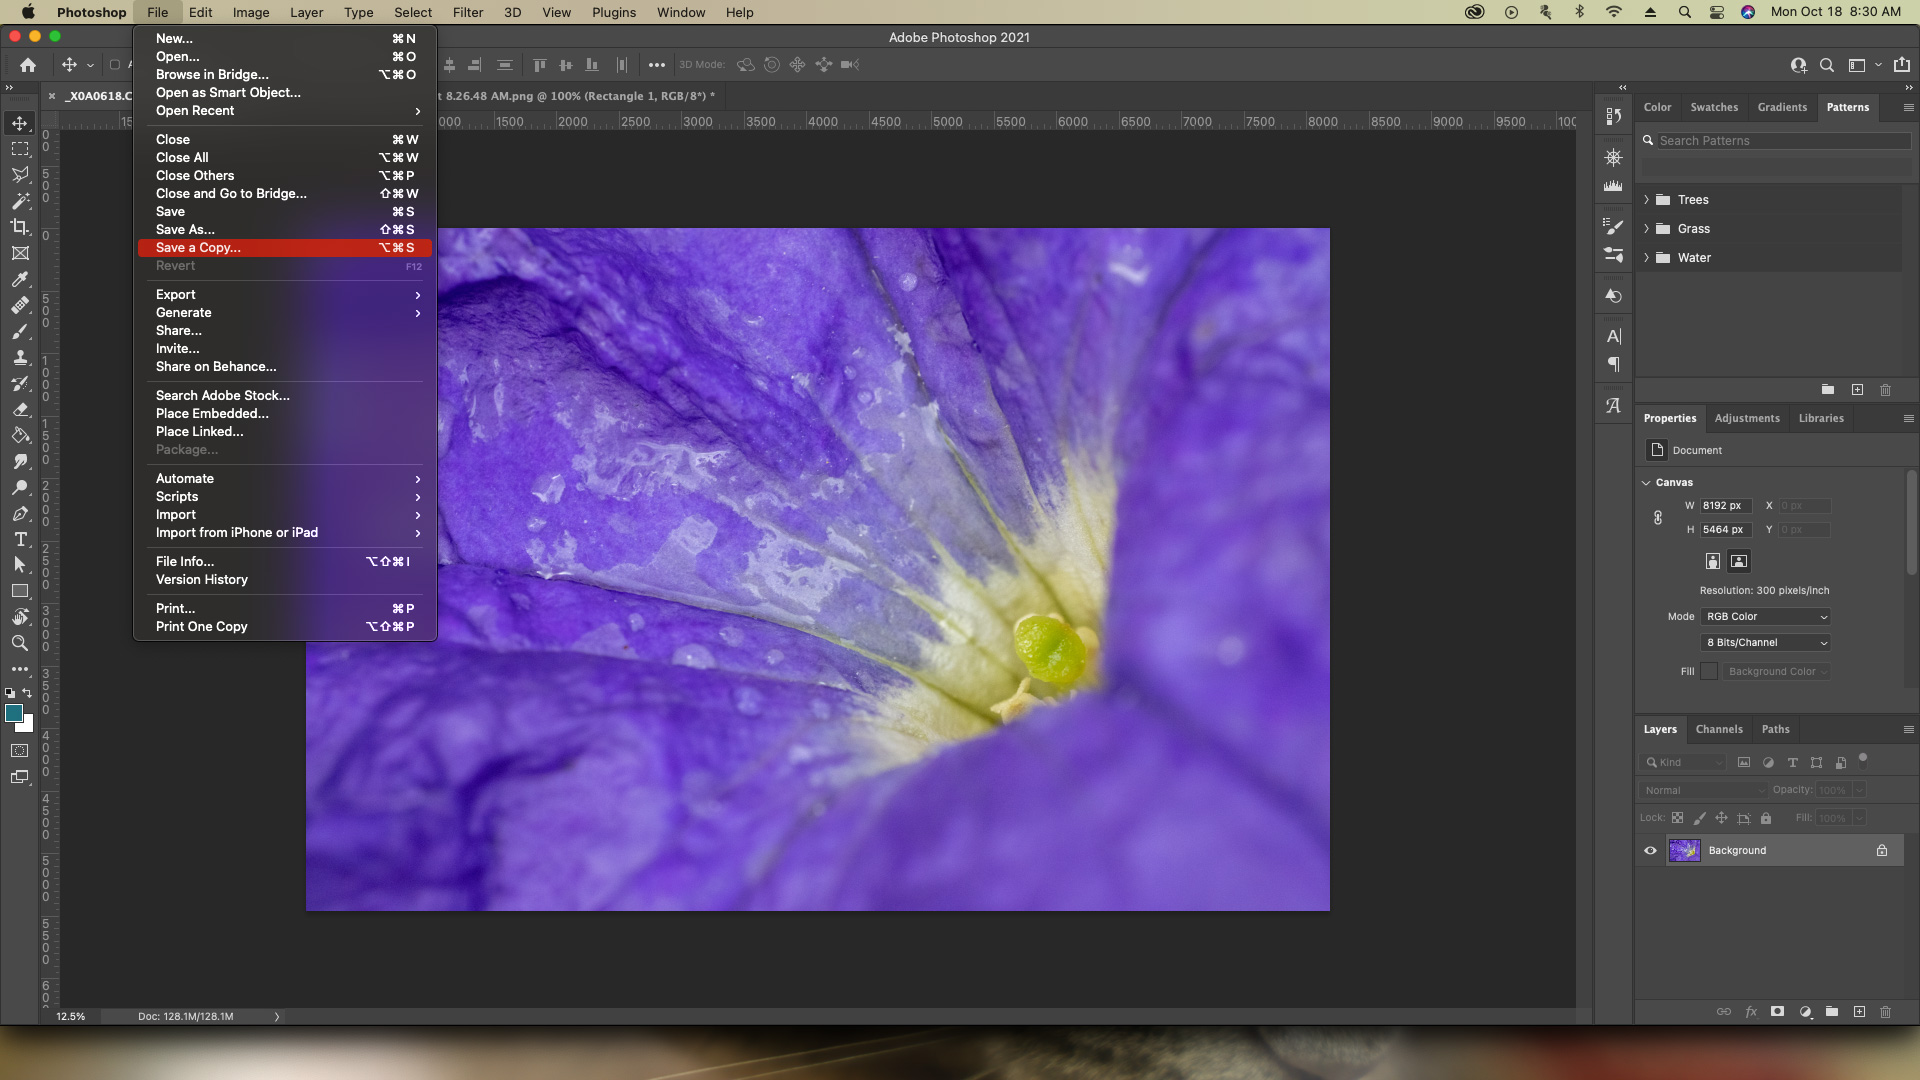
Step One: Navigate to File > Save a Copy
Simply go up to File and select the Save a Copy option.
Step Two: Select Format
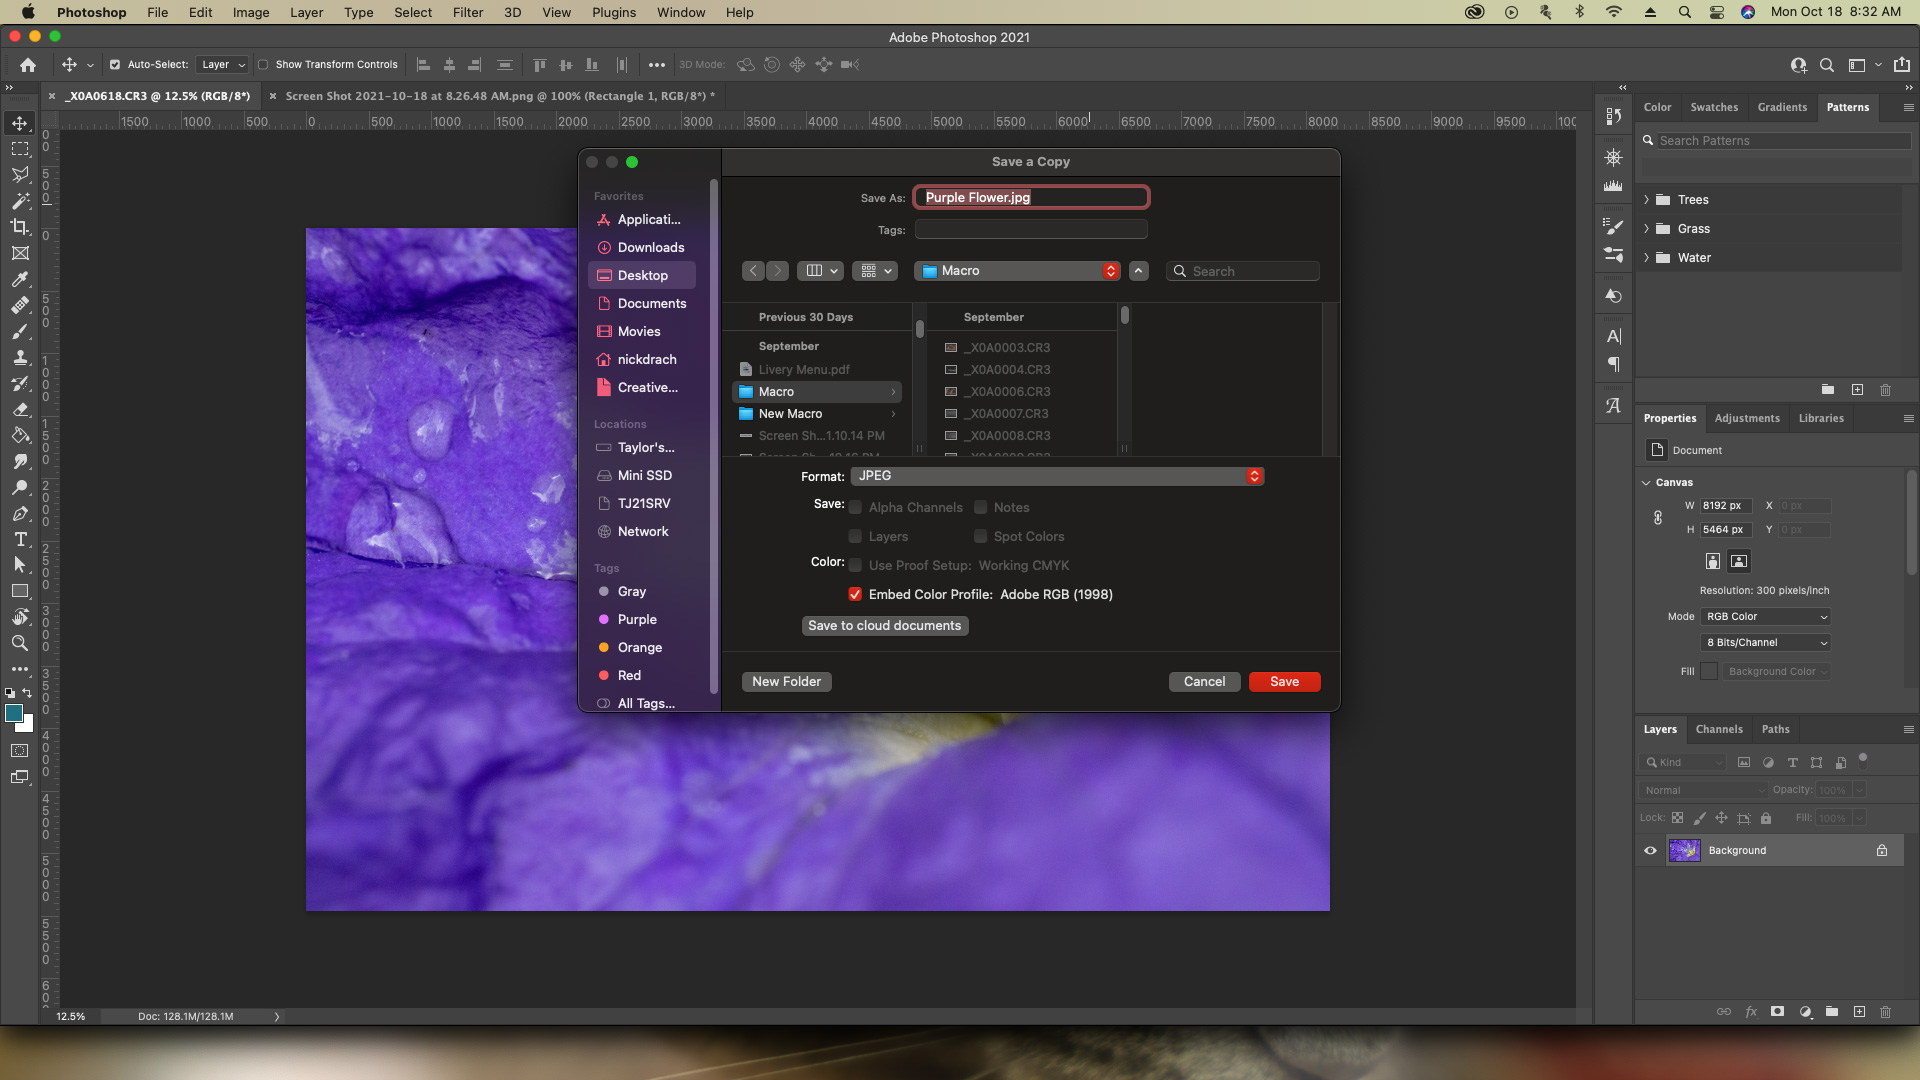
Doing the previous step will open a dialog box with a few settings that need to be specified, but first we’ll start with the most important one which is file format. Using the dropdown menu, users can specify what format they want to use to save.

Step Three: Specify Destination and File Name
Next, users should select the destination folder for the file as well as the file name. “Copy” will be added to the filename by default however this option can be changed within the File Handling preferences as described above when reverting to Legacy Save As, which can also seemingly defeat the purpose of this new system.
Step Four: Save
Finally, select Save and the process will be complete.

Method 2: Using Save As
In case out of habit a user selects Save As Adobe offers a way for users to still Save a Copy.
Step One: Navigate to File > Save As
First, go up to File and select the Save As option. This will present designers with the ability to select between Photoshop, Photoshop PDF, and others as the available file formats. If you wish to save in any other format not shown within the dropdown, continue to step two.

Step Two: Select Save a Copy
A button on the right of the format dropdown will be present labeled Save a Copy. Select this button to change from the Save As window to the Save a Copy window.
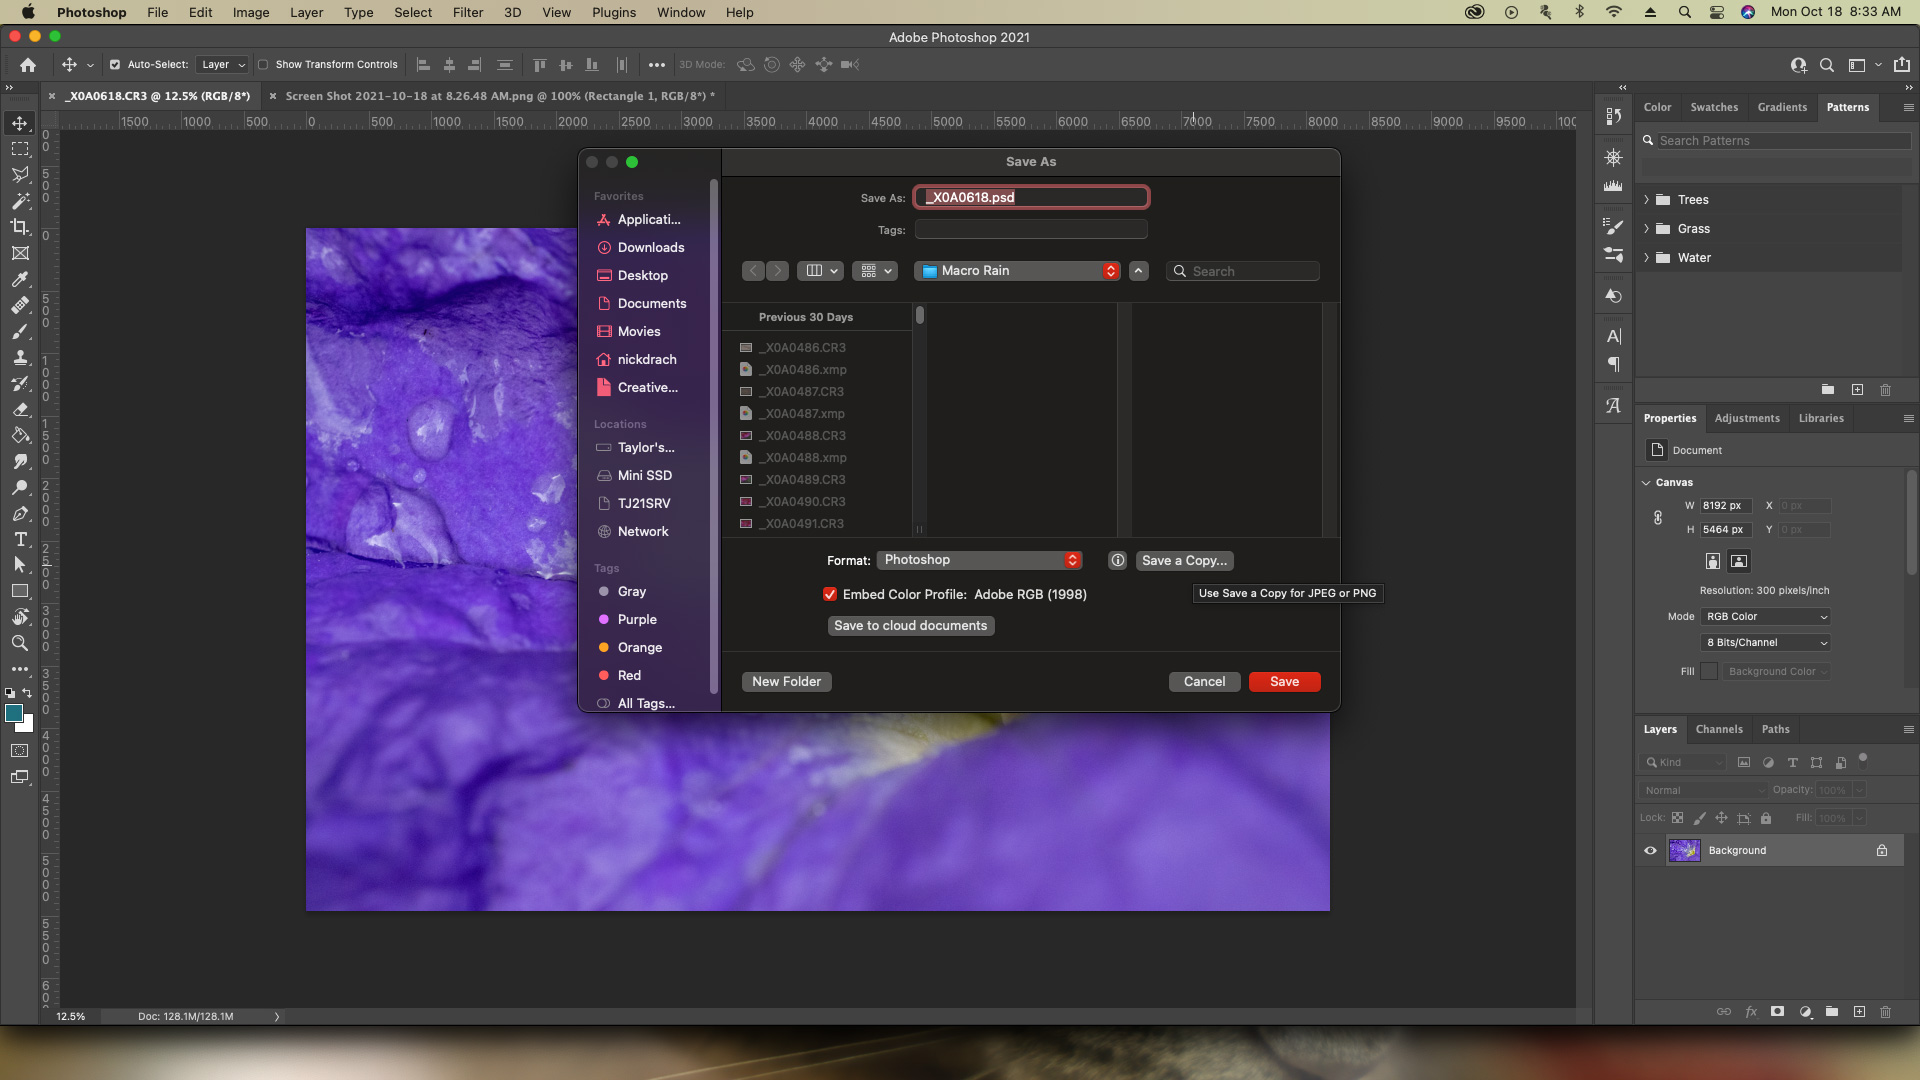
Step Three: Select Format
Once inside this new window, users are presented with the original.

Step Four: Specify Destination and File Name
As previously mentioned, users should select the destination folder for the file as well as the file name. “Copy” will be added to the filename by default however this option can be changed within the File Handling preferences as described above when reverting to Legacy Save As, which can also enable users to defeat the purpose of this new system.

Step Five: Save
Finally, select Save and the process will be complete.

Conclusion
This change feels like a step backward in terms of user experience by Adobe. The only reason I could see this working is if people were accidentally saving over the original files but even then there is still a warning dialog box that appears if a user goes to save over an existing file. Users are already going to the Save As command which indicates that this isn’t a regular save, so why is there this added extra step? Thankfully, Adobe offers the Legacy Save As option to be enabled and return the original workflow. Additionally in this update there are improvements to the neural filters in terms of a more streamlined interface by removing the Beta Filters tab and combining them all under All Filters. You can read more about Neural Filters with our article found here.

