Color Grading Panel | Adobe Lightroom Tutorial
With the release of Adobe Lightroom 4.0 in October 2020 Adobe released a feature they titled Color Grading. The new tool allows for photographers to have deeper control over the shadows, midtones, and highlights of their images. Featuring a three color wheel design similar to that of Adobe Premiere’s Lumetri Color Wheels. Those familiar with these color wheels should have no issue grading photos within Lightroom.
Step One: Open the Photo
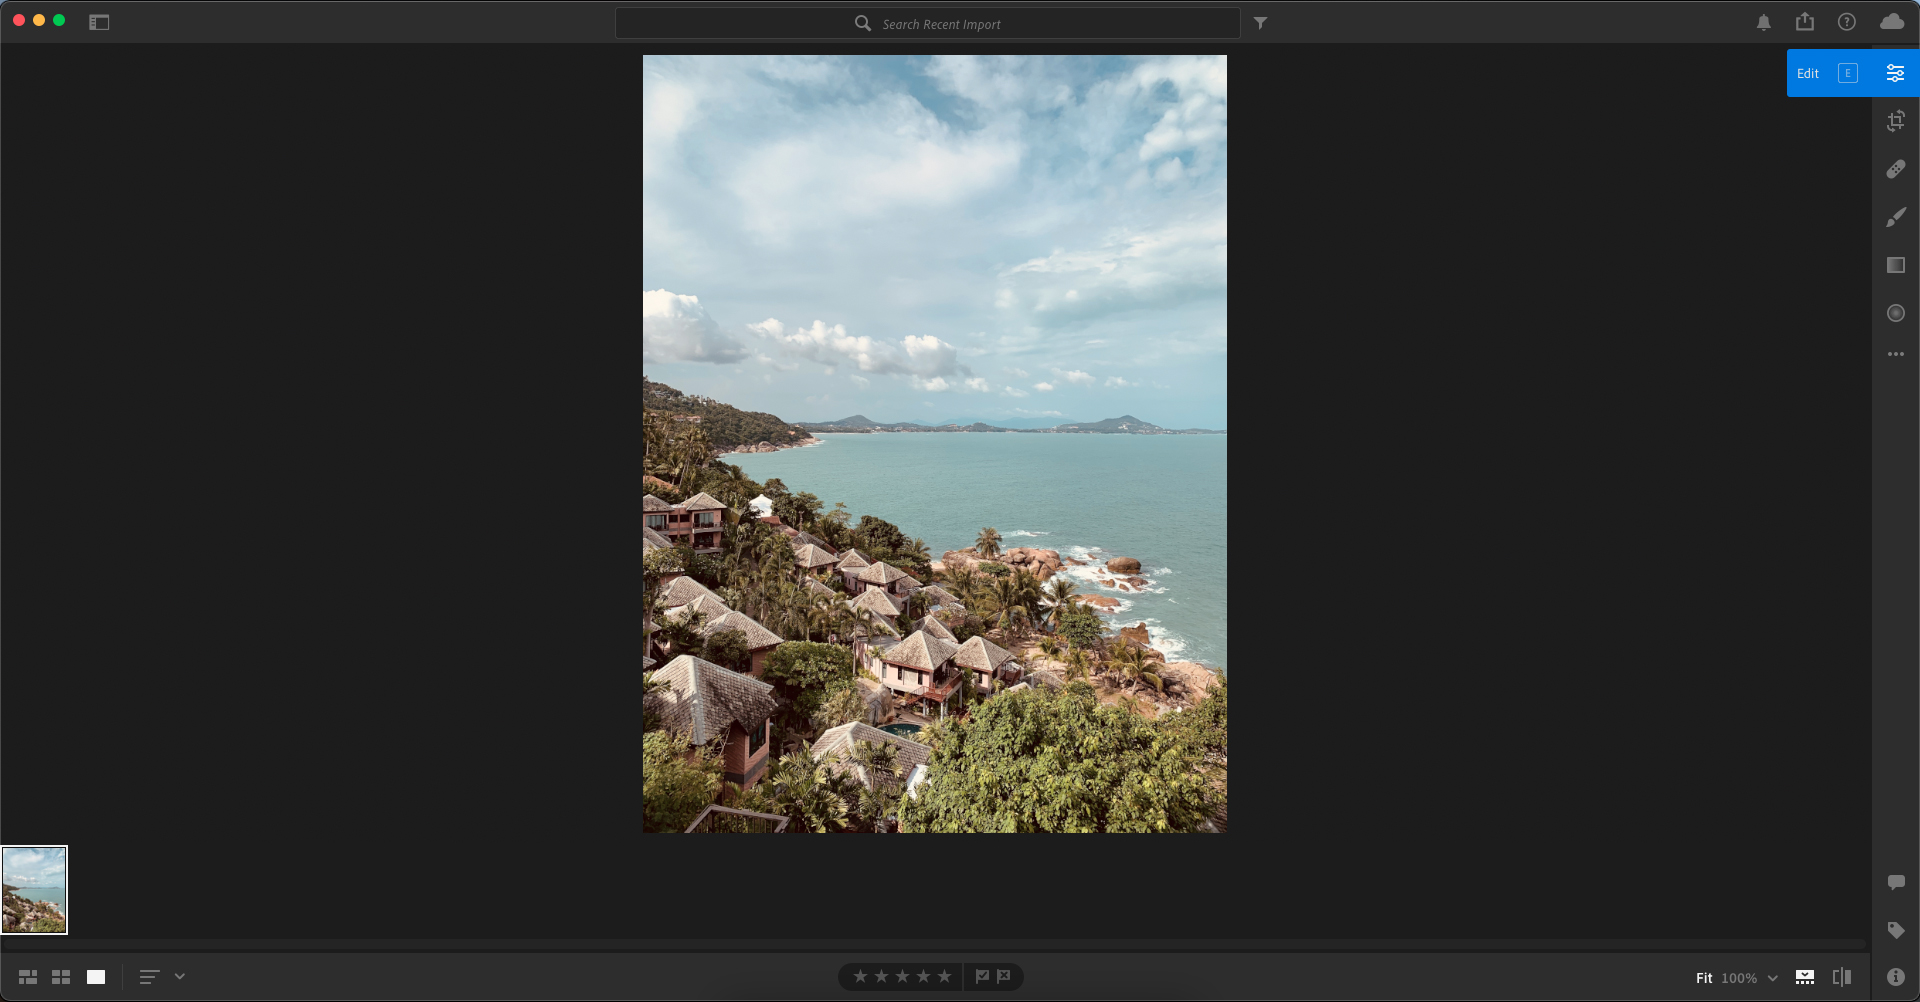
Open a photo within Lightroom desktop and click the Edit icon in the right panel of Detail view.

Step Two: Open Color Grading
In the Color panel and expand the Color Grading section.

Step Three: Adjusting Shadows, Midtones, and Highlights
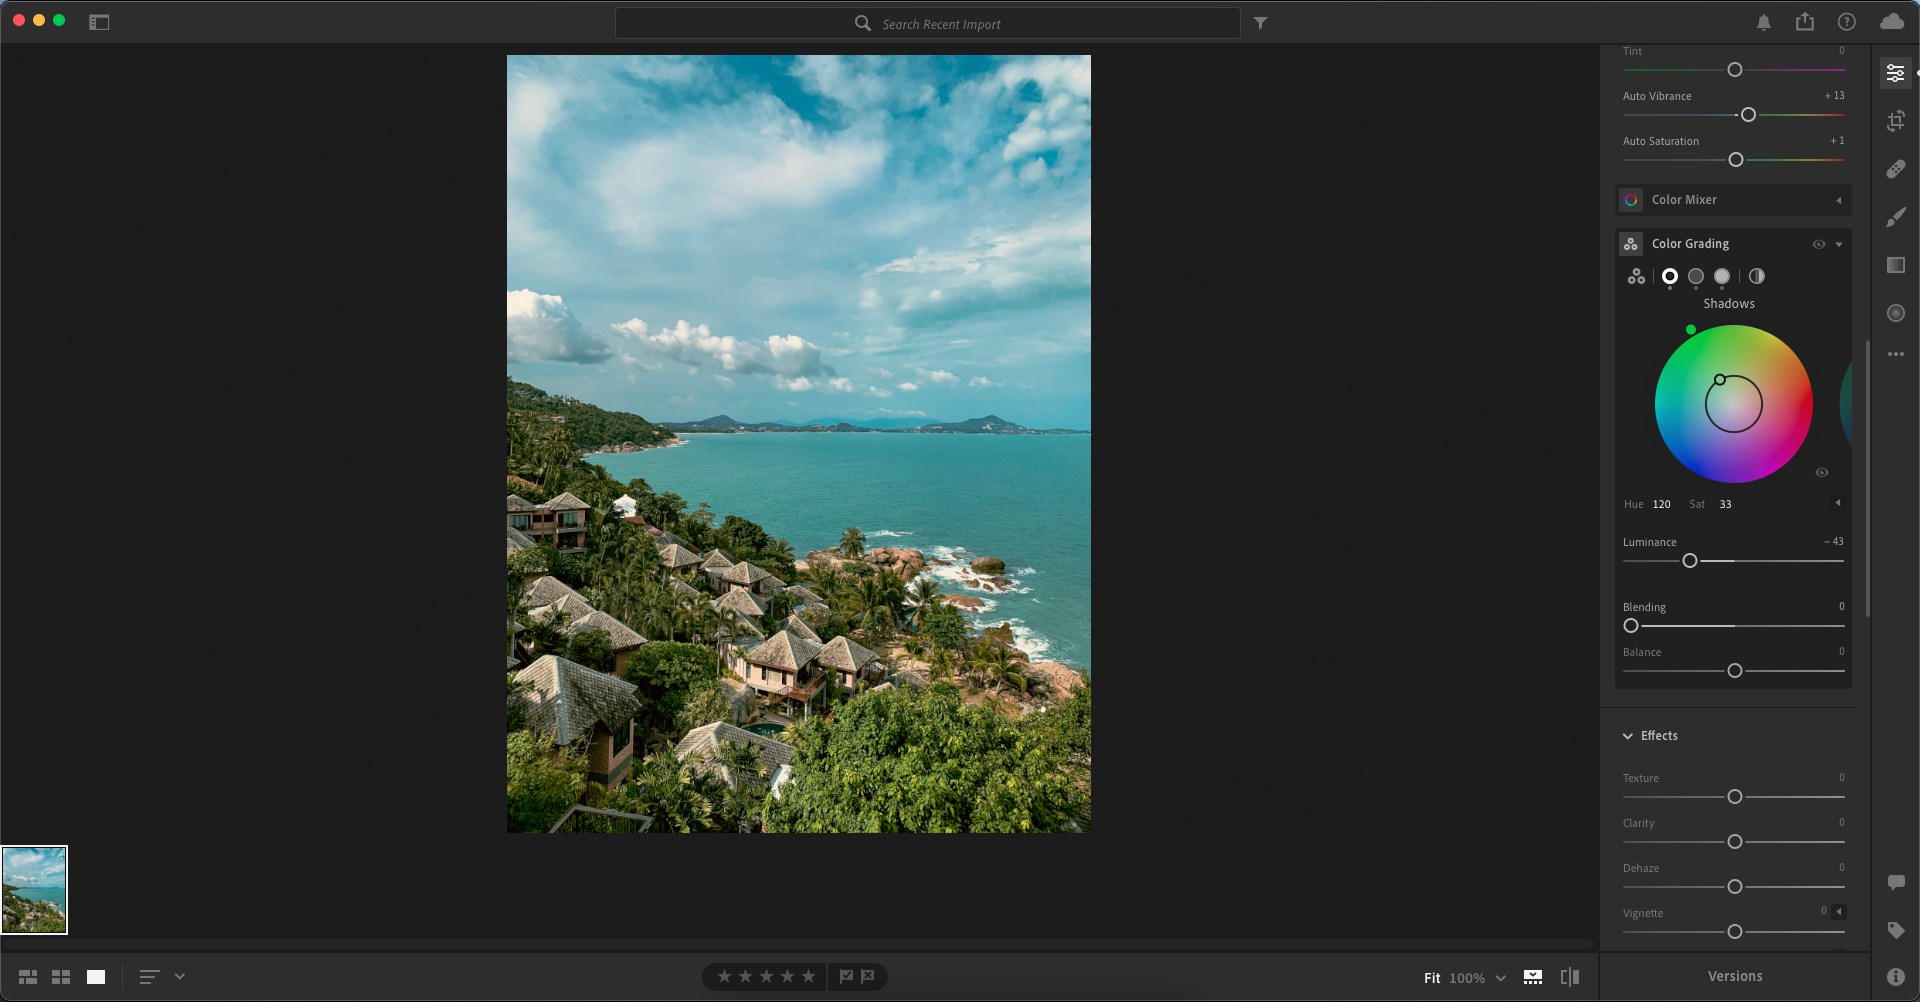
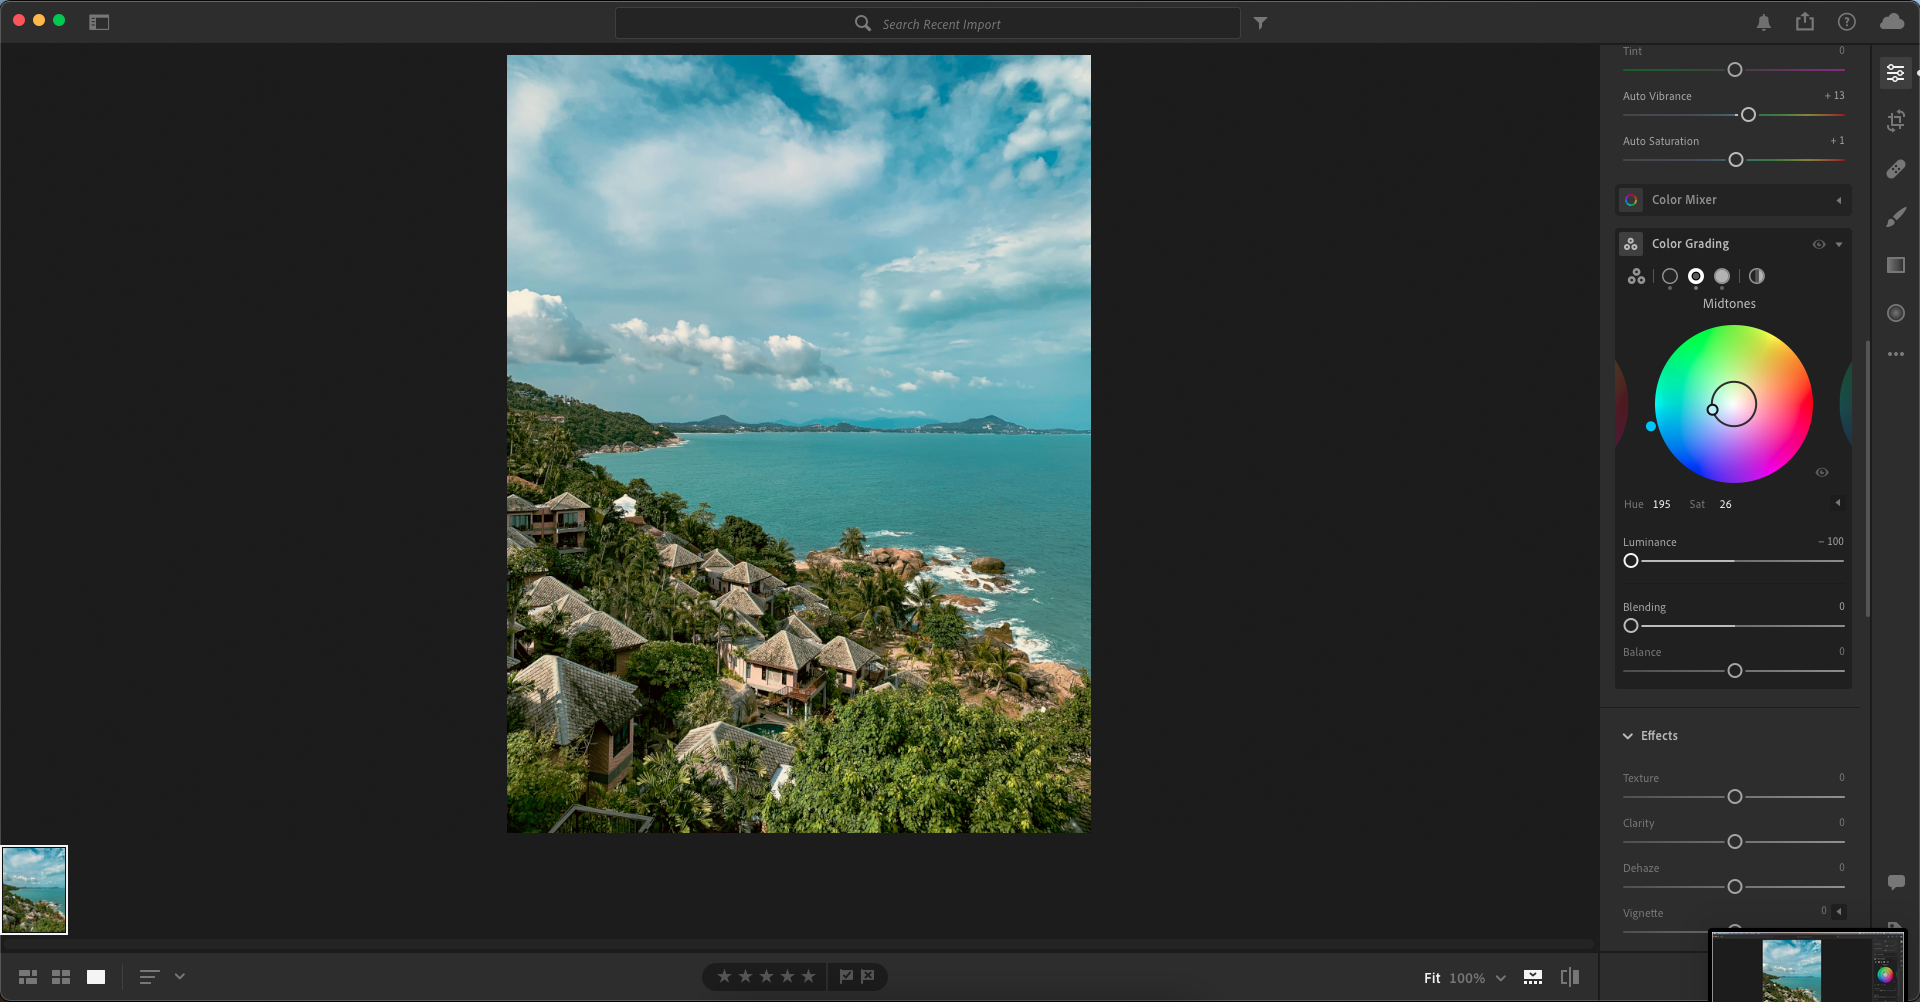
Upon opening the Color Grading section users are greeted with three color wheels – one for each for shadows, midtones, and highlights. Color wheel icons in the center which allows users to control and view color wheels individually. How these wheels work is that adjusting the center circle will change the color tint respectively. Luminance of these tints is also available for adjustment using the slider below the wheel. For additional info on how to color grade an article will be coming soon.

Step Four: Blending and Balance
Adjusting the Blending slider blends the degree of overlap between shadows and highlights. Color Grading replaces the Split Toning effect, however to replicate it drag the Blending slider to 100. Moving the slider to the right maximizes the overlap of shadows and highlights.
Using the Balance slider to control the amount of Shadows and Highlights. Values above 0 increase the effect of the highlights while values below 0 will increase the effect of the shadows.

Step Five: Global Color Settings
The rightmost color wheel icon is the Global color wheel slider. These options allow you to change the overall color of the photo without affecting the previous edits of shadows, midtones, and highlights.

Conclusion
The options for color grading within Adobe Lightroom and even Camera Raw mirroring that of other programs within Adobe and competitors is a great addition. Replacing split toning with the color grading panel shows a step in the right direction, however I feel I’d like a more streamlined version of color grading similar to a Lumetri color copy to allow for a seamless transition and experience. Check out our other articles on the 4.0 update: Graphical Watermarks (Coming Soon), Choose Best Photos (Coming Soon), and Auto Versions (Coming Soon).


