Radial, Grid, and Mirror Repeat | Adobe Illustrator Tutorial
With the release of Adobe Illustrator 25.1 in January 2021 Adobe released a set of features they titled Radial, Grid, and Mirror Repeat. The logic behind this new set of features is to let the user seamlessly repeat objects in a one click action. Want to change something on said object after a repeat has occurred? No need to undo, simply modify the object and all other instances will auto-update.
Repeating Options

Radial
Creates a repeating set of objects around a central point

Grid
Creates a repeating set of objects in a grid pattern

Mirror
Creates a duplicate of the object in mirrored form.
Radial Repeat
Creating a Radial Repeat
Creating a radial repeat is a 2 step process.
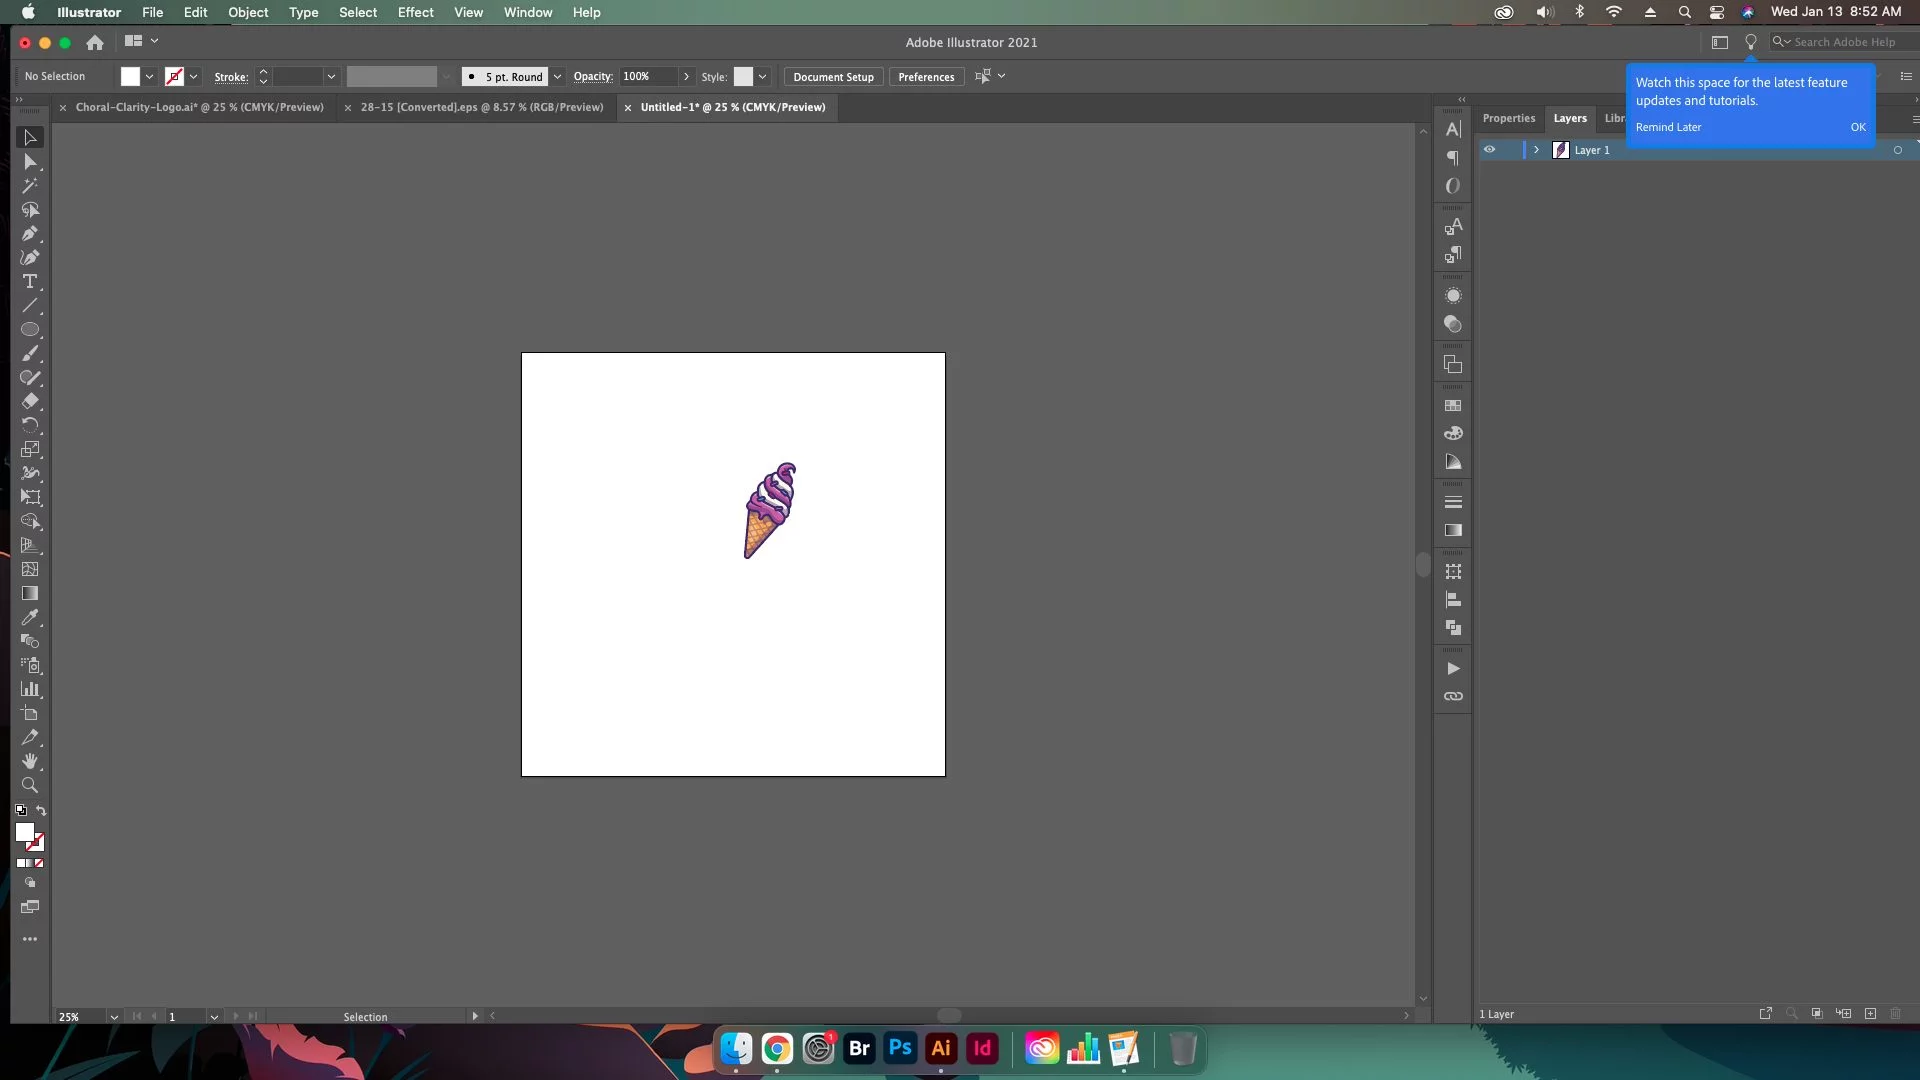
1. Select Object
First simply create the base object that will be used for duplication purposes. Select this object utilizing the Selection tool.
2. Radial Repeat
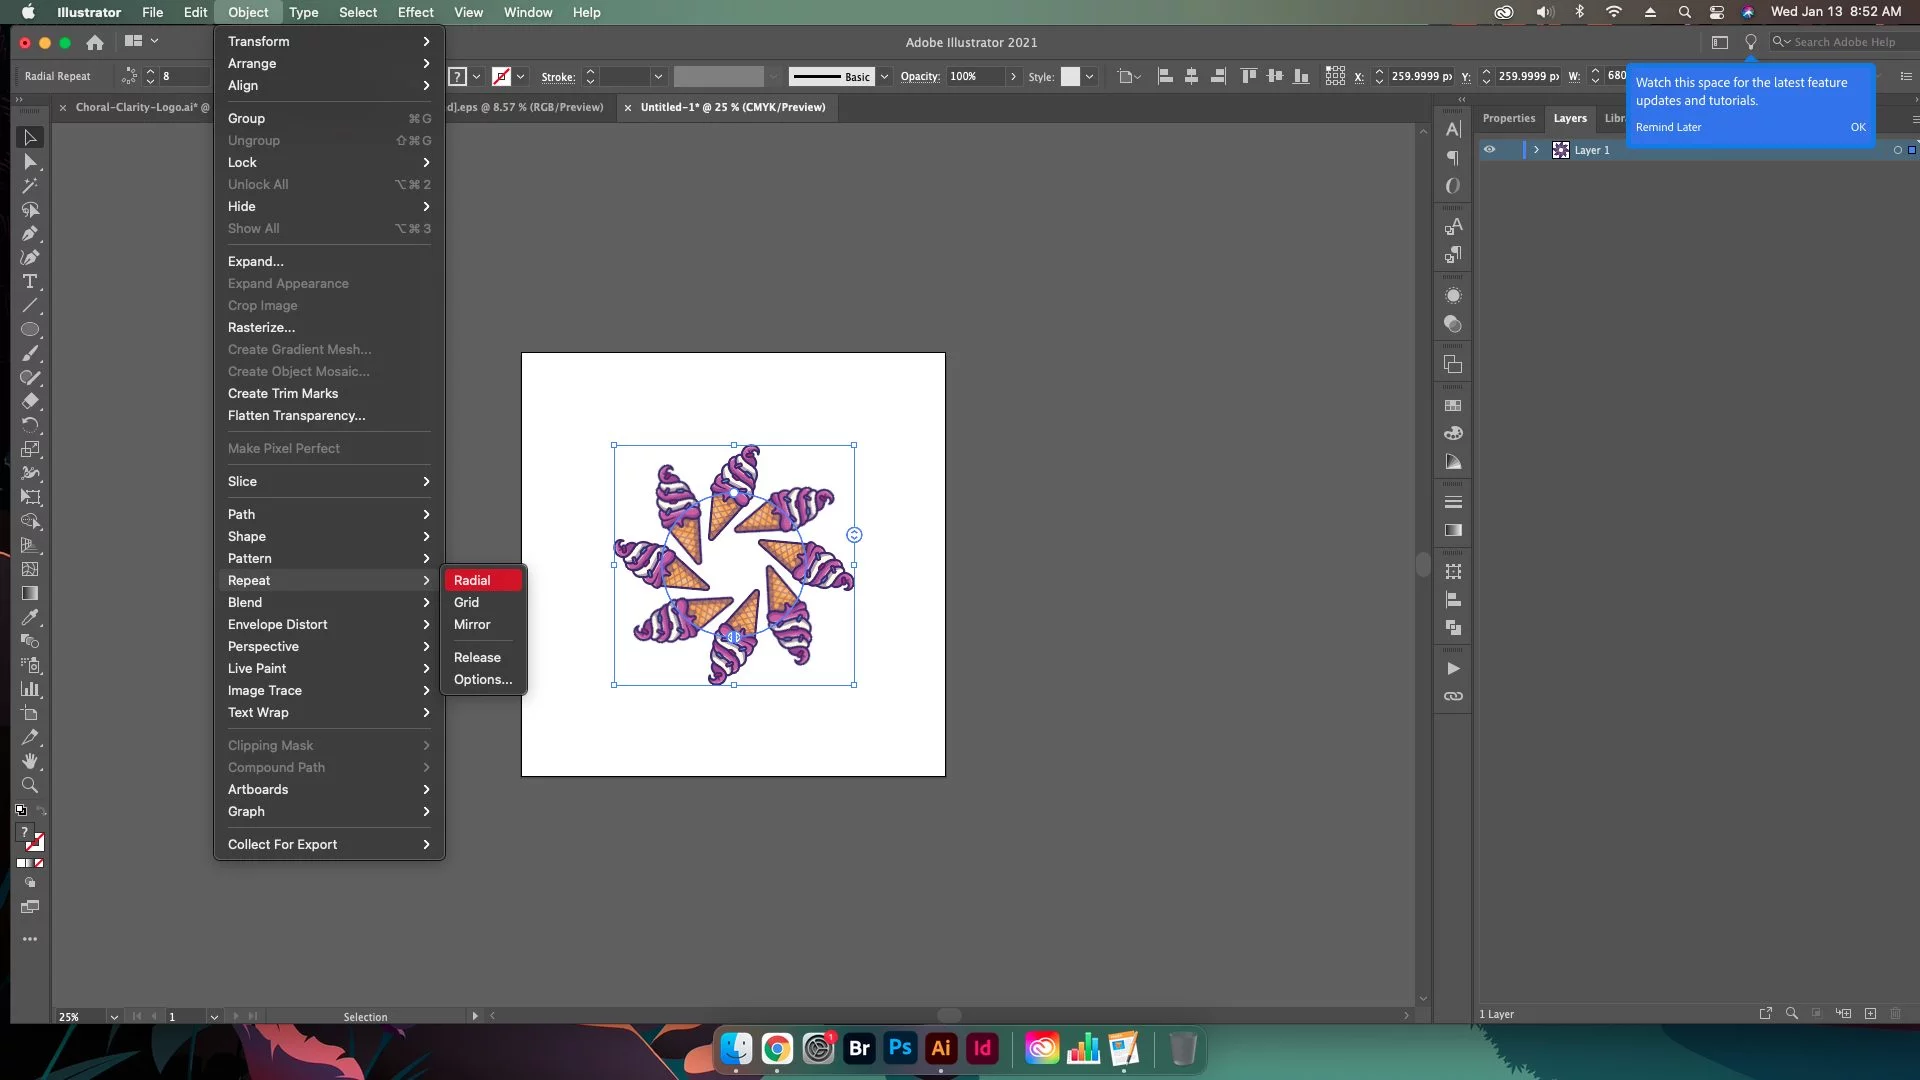
Second choose the options Object > Repeat > Radial.
The object is then repeated in a radial pattern using the default options, (by default this is set to 8 instances).
Modifying an Existing Radial Repeat
Radial Repeat Instances
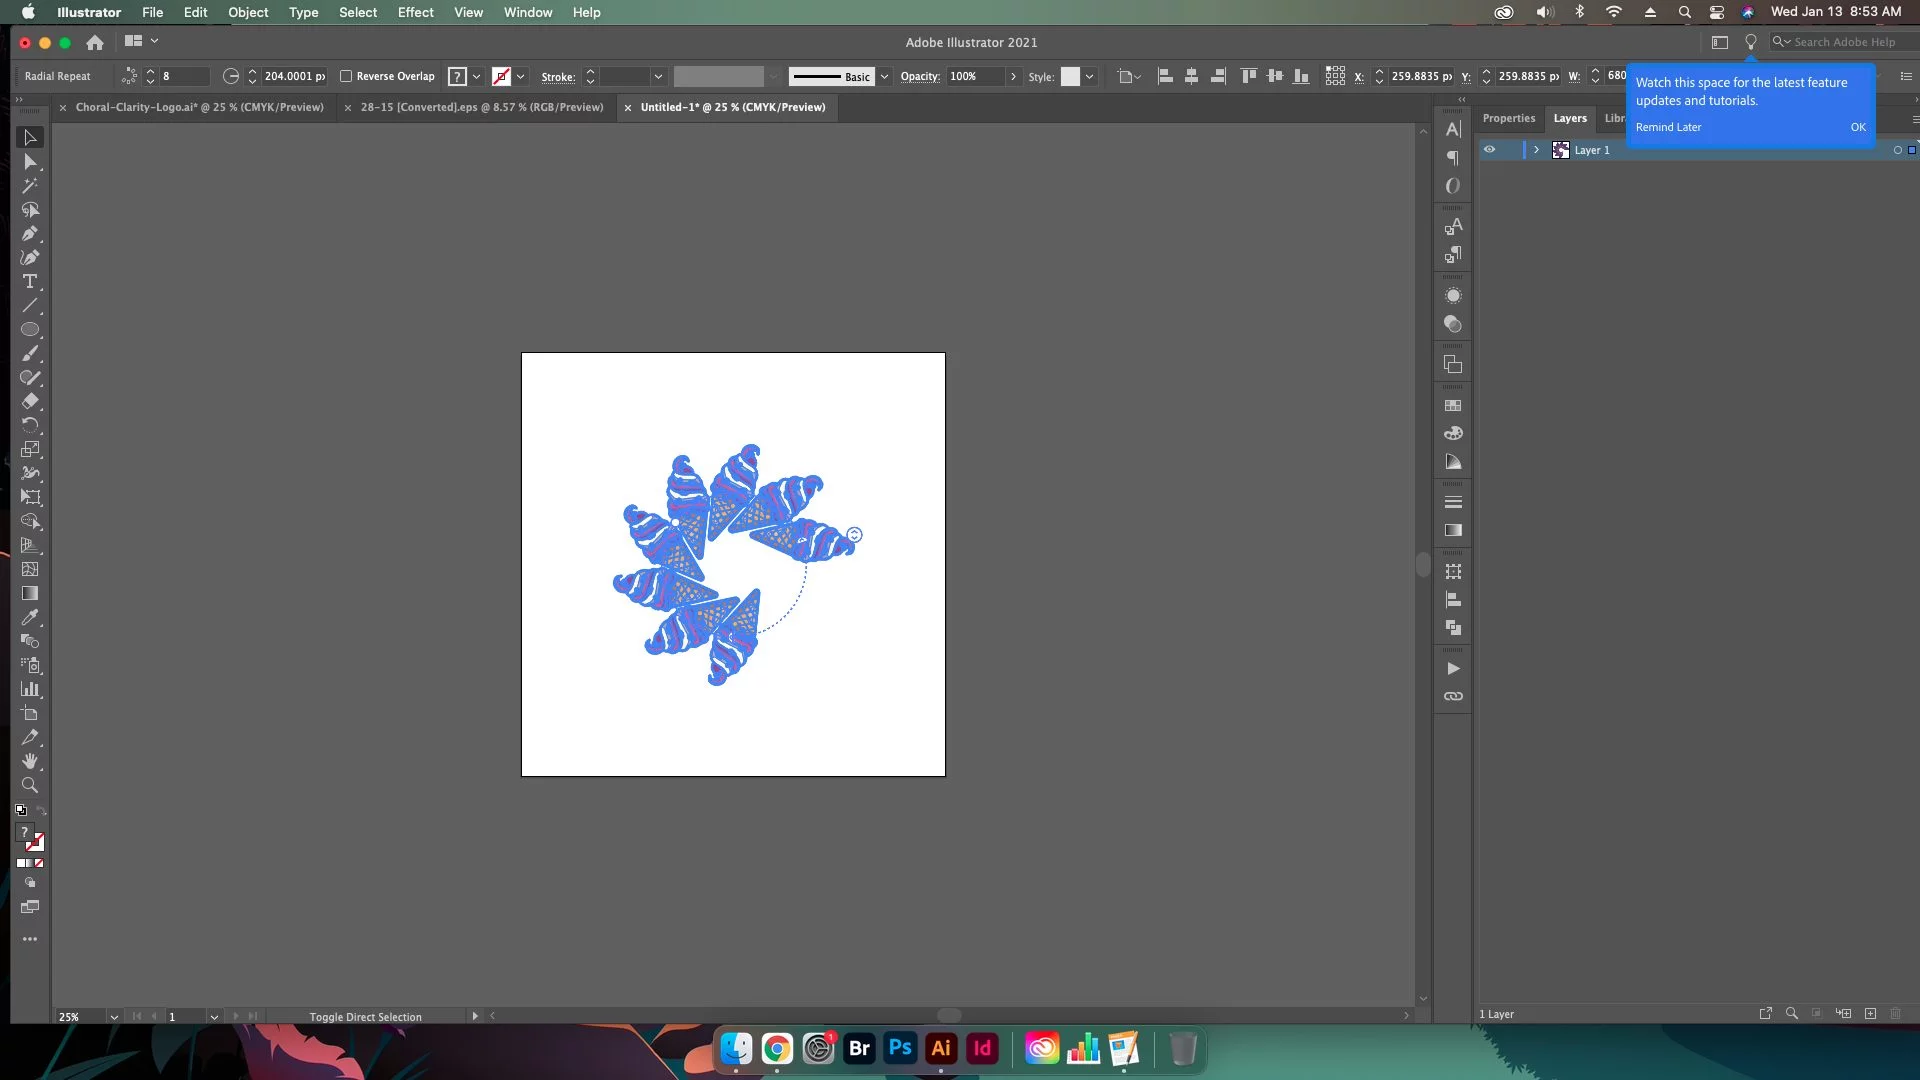
As stated above, the default for this radial repeat is 8 instances. To change this instance count, select the artwork that has been repeated and click the Instances control. This will appear as a circle with an arrow pointing both up and down. Dragging the arrow up on the Instances control will increase the number of instances and vice versa.
Radial Repeat Radius
Inside the repeated artwork is another circle with an arrow in it, this is how you change whether the repeat goes across a completed 360 degrees or any other amount across the theoretical circle.
Radial Repeat Size
To change the size of the radial repeat utilize the white circle within the repeated artwork. Dragging this circle in will reduce the size while dragging it out will increase the size.
Setting Radial Repeat Options
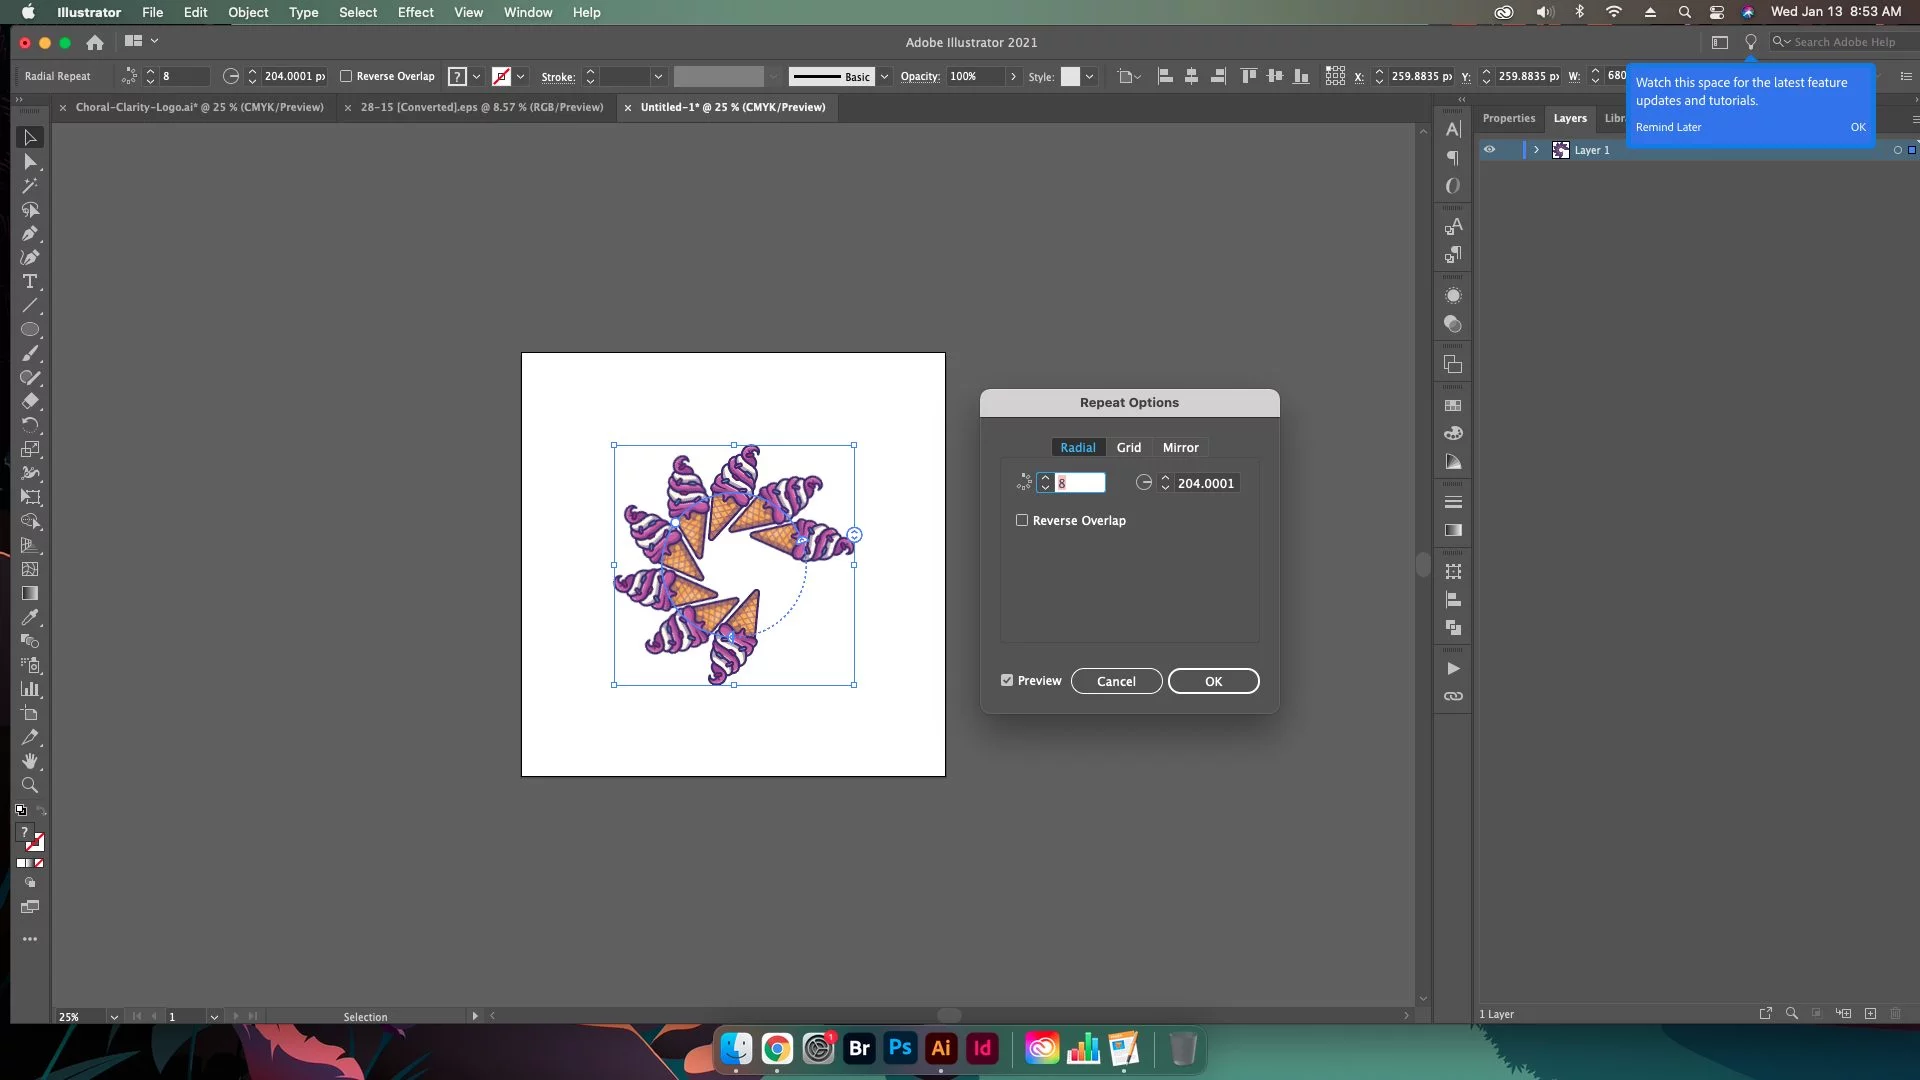
To set up radial repeat options and preview the effects use the following steps.
Select the repeated artwork
Choose Object > Repeat > Options. A dialog box will appear labeled Repeat Options, select the Radial tab.
You are now given a list of the following options
- Number of Instances: Specify the exact number of repeat instances for the selected artwork (default 8).
- Radius: Specify the exact radius of the circle around which the radial repeat is created.
- Reverse Overlap: A checkbox option which allows the user to reverse the stacking order of the radially repeated objects.
Grid Repeat
Creating a Grid Repeat
Creating a grid repeat is a 2 step process.
1. Select Object
First simply create the base object that will be used for duplication purposes. Select this object utilizing the Selection tool.

2. Grid Repeat
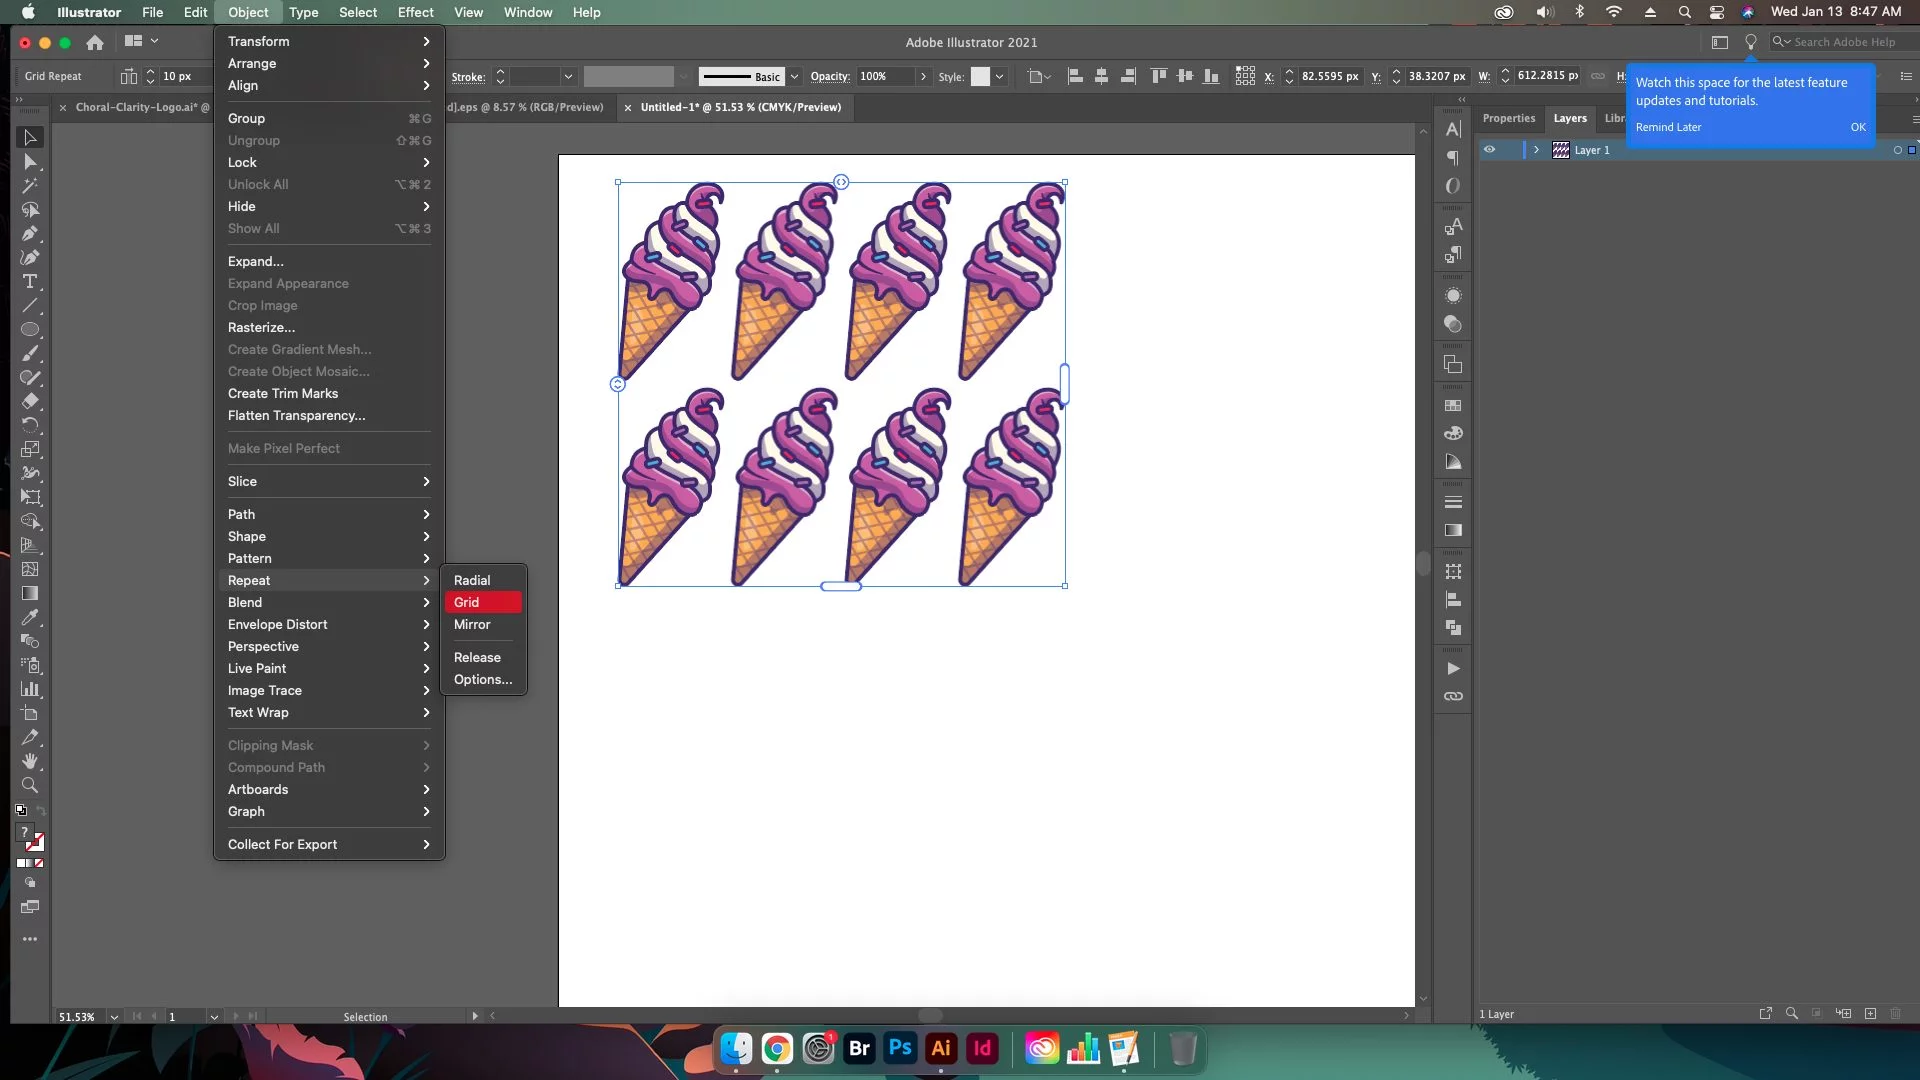
Second choose the options Object > Repeat > Grid.
The object is then repeated in a grid pattern using the default options.
Modifying a Grid Repeat
Adding Rows and Columns to a Grid Repeat
Two handles (rounded rectangles) appear on repeated artwork. The first (located on the right) adds or subtracts the number of rows in a repeated artwork. The second handle (located at the bottom) adds or subtracts the number of columns in a repeated artwork.
Changing the Size of a Grid Repeat
The size of a grid repeat is dictated by the corners, which can be dragged to increase or decrease the size.
Changing the Spacing of a Grid Repeat
Using the circles with arrows inside them it is possible to change the spacing of the grid both horizontally and vertically. Using the circle located at the top of the repeated artwork controls the spacing horizontally between the repeated items. To control the vertical spacing, utilize the circle on the left hand side of the repeated artwork.

Setting Grid Repeat Options
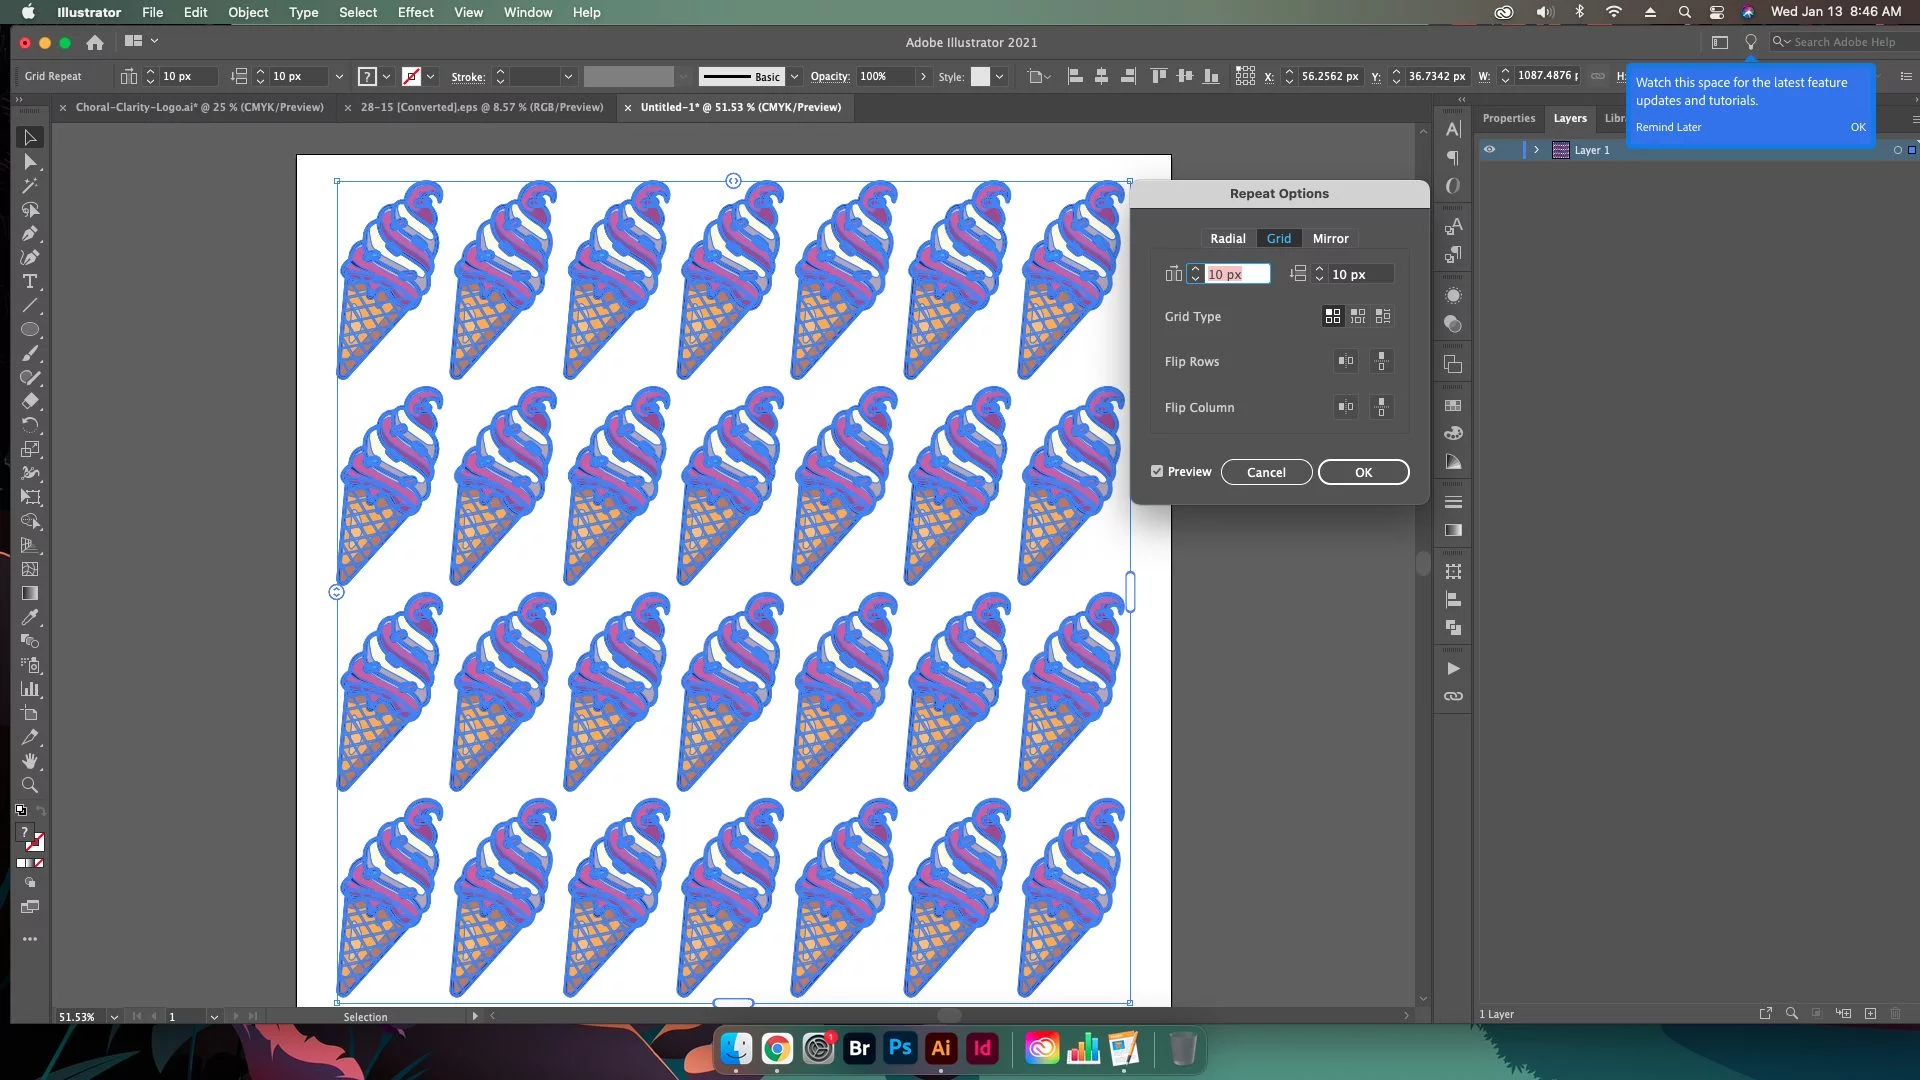
To set up grid repeat options and preview the effects use the following steps.
Select the repeated artwork
Choose Object > Repeat > Options. A dialog box will appear labeled Repeat Options, select the Grid tab.
You are now given a list of the following options.
- Vertical Spacing: Modify the vertical space between objects in the grid
- Horizontal Spacing: Modify the horizontal space between objects in the grid
- Grid Type: Select the grid type used to arrange the repeated artwork in rows and columns. The three options presented are a standard grid, a grid offset horizontally, and a grid offset vertically.
- Flip Row: Flip the row in vertical (y-axis) or horizontal (x-axis) directions.
- Flip Column: Flip the column in vertical (y-axis) or horizontal (x-axis) directions.
Mirror Repeat
Creating a Mirrored Repeat
Creating a mirror repeat is a 2 step process.
1. Select Object
First simply create the base object that will be used for duplication purposes. Select this object utilizing the Selection tool.

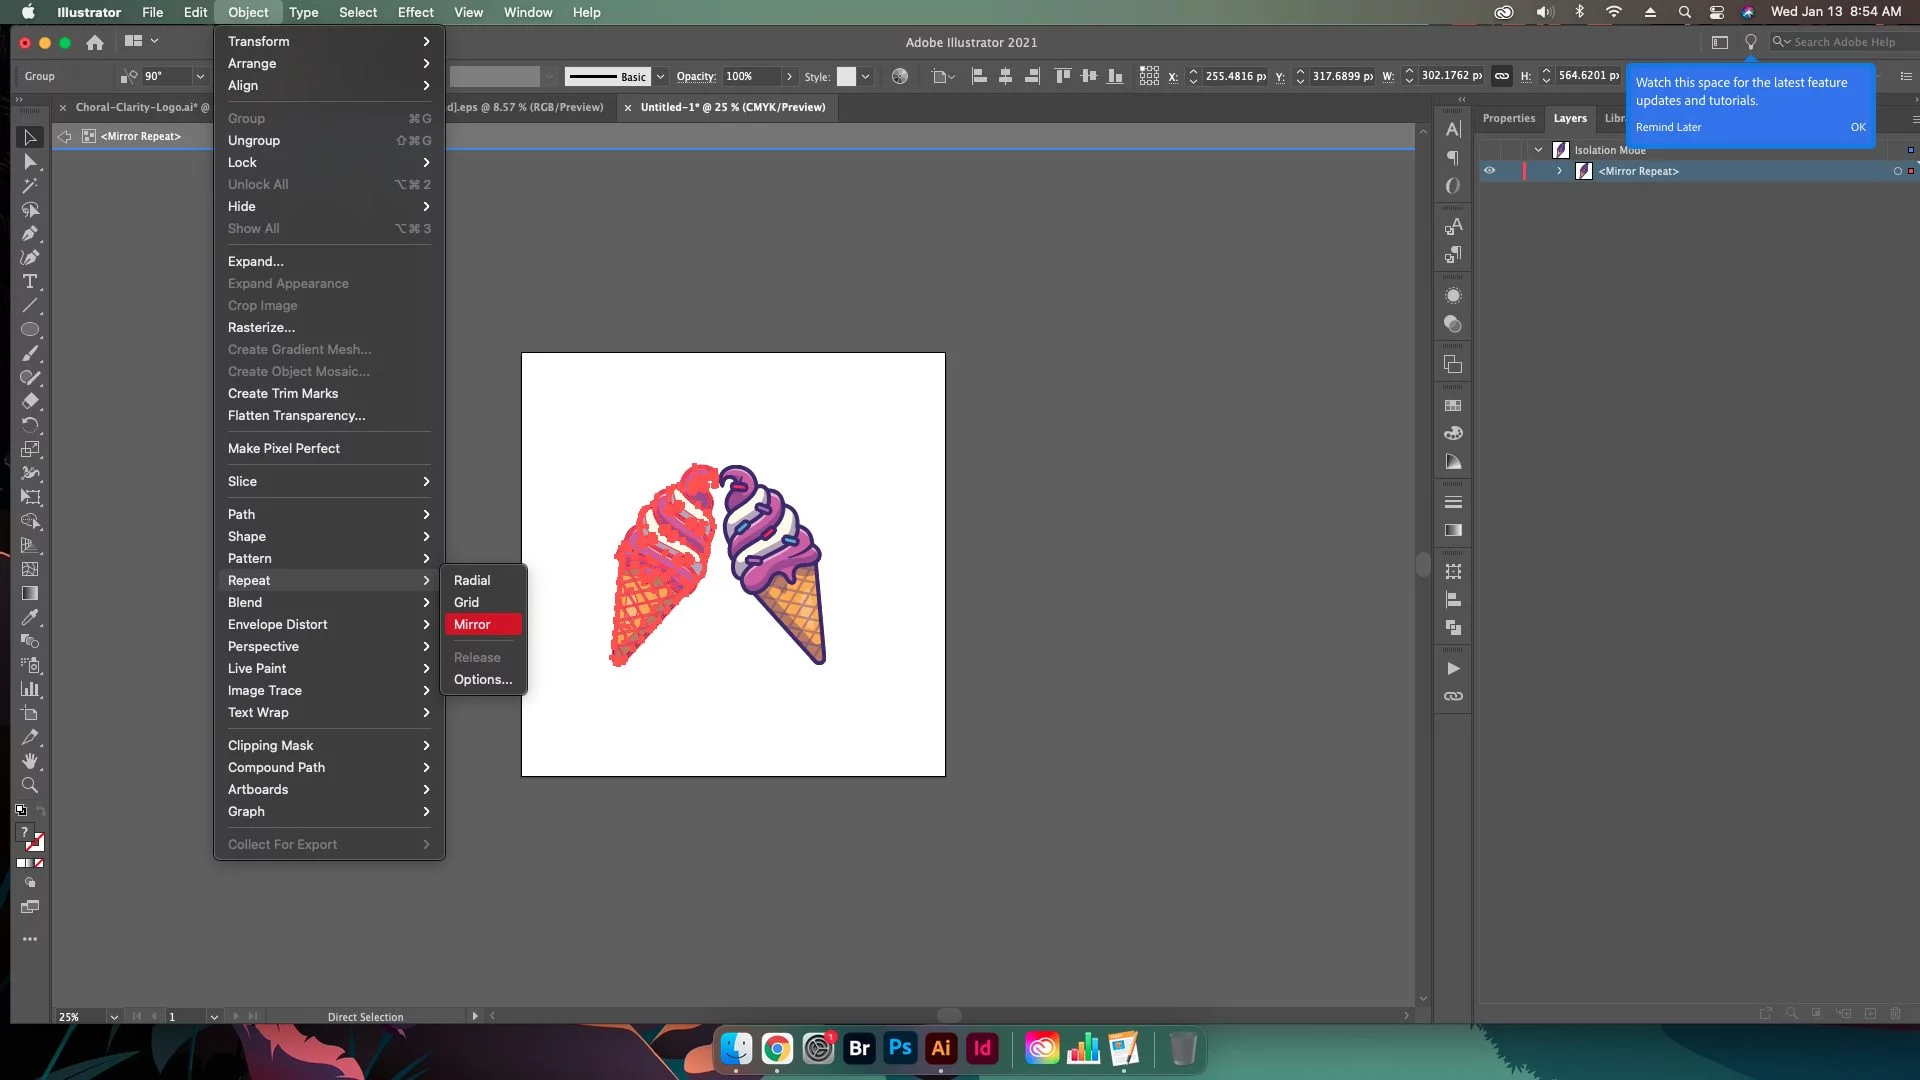
2. Mirror Repeat
Second choose the options Object > Repeat > Mirror.
The object is then mirrored using the default options.
Modifying a Mirror Repeat
Rotating the Mirrored Repeat
The handles above the original artwork to rotate or transform the mirrored repeat.
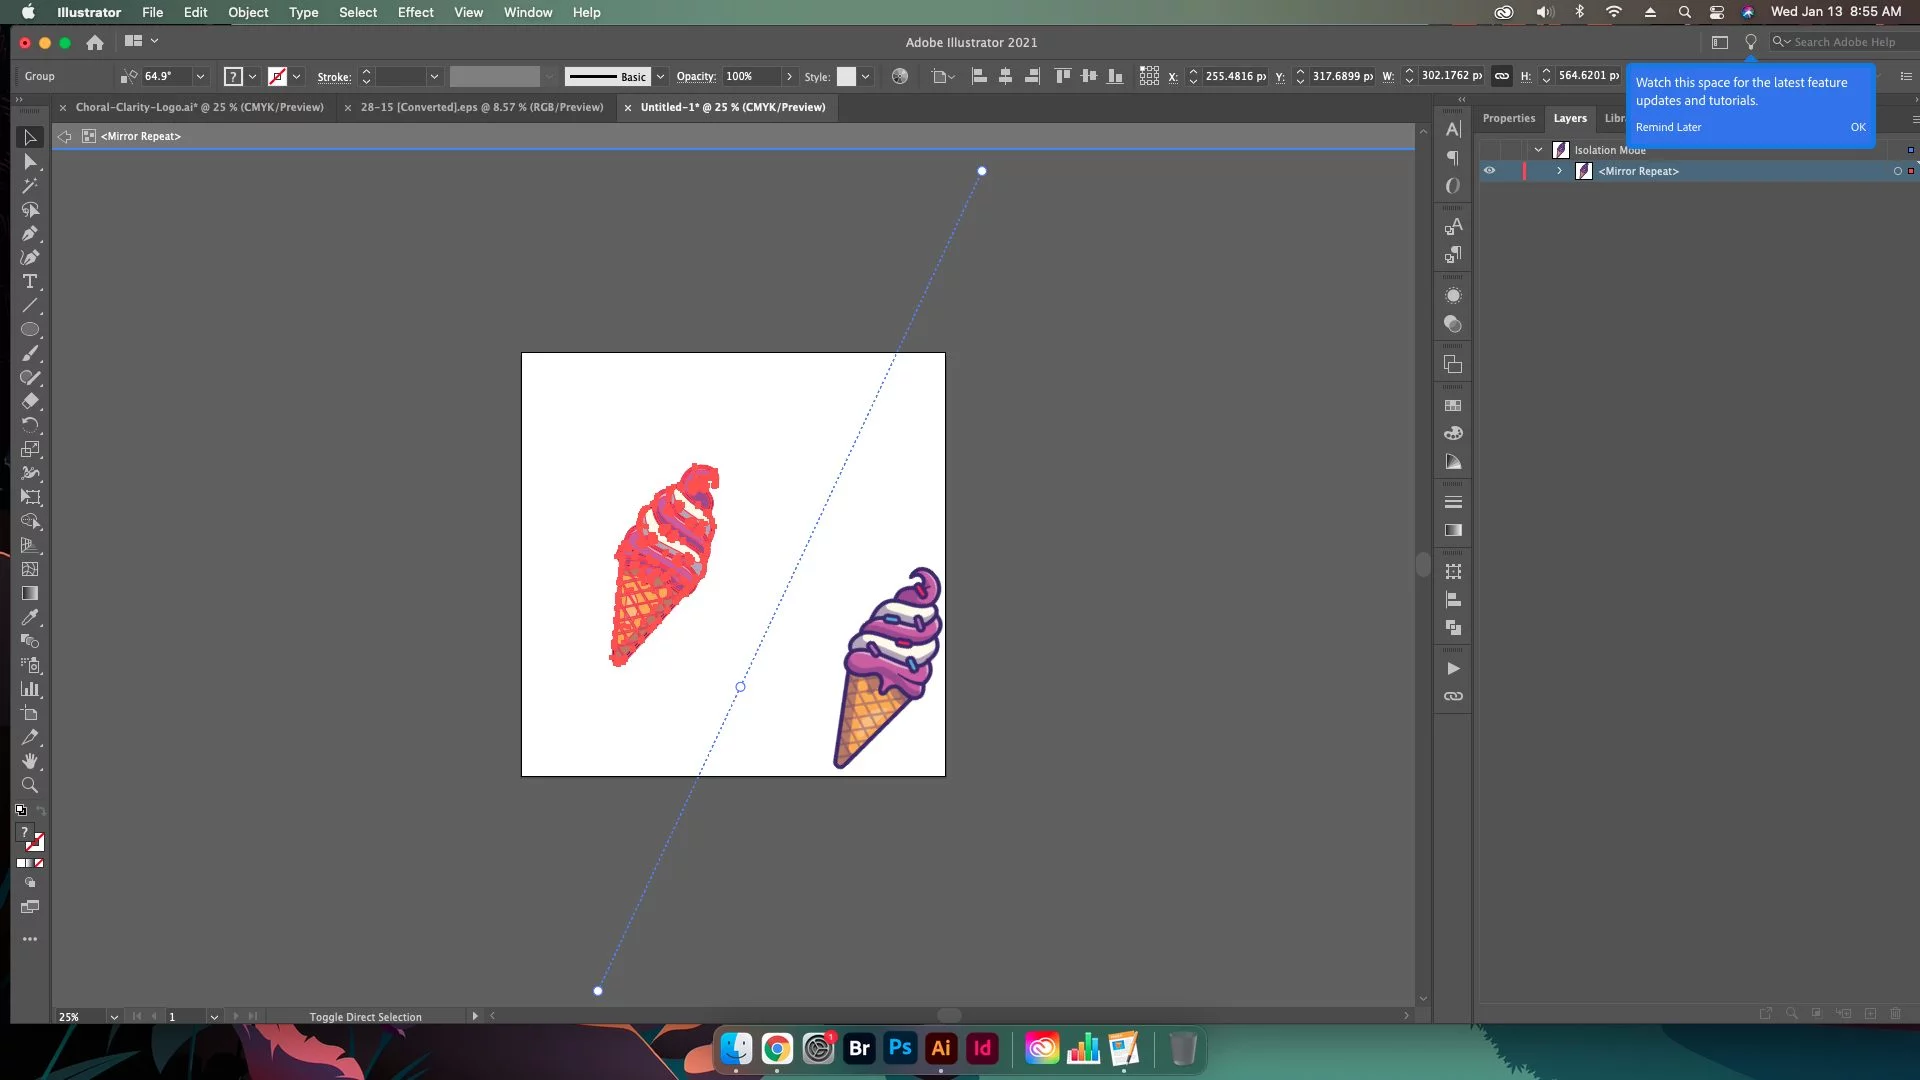
Changing the Symmetry Axis on a Mirrored Repeat
The line between the original and repeated object is the symmetry axis. Dragging the axis horizontally increases the spacing between the repeat and the original. Dragging the axis up and down changes the angle of symmetry.
After the artwork is changed, the artwork will be grouped together. In order to edit the objects again, double click on the artwork.
Setting Mirror Repeat Options
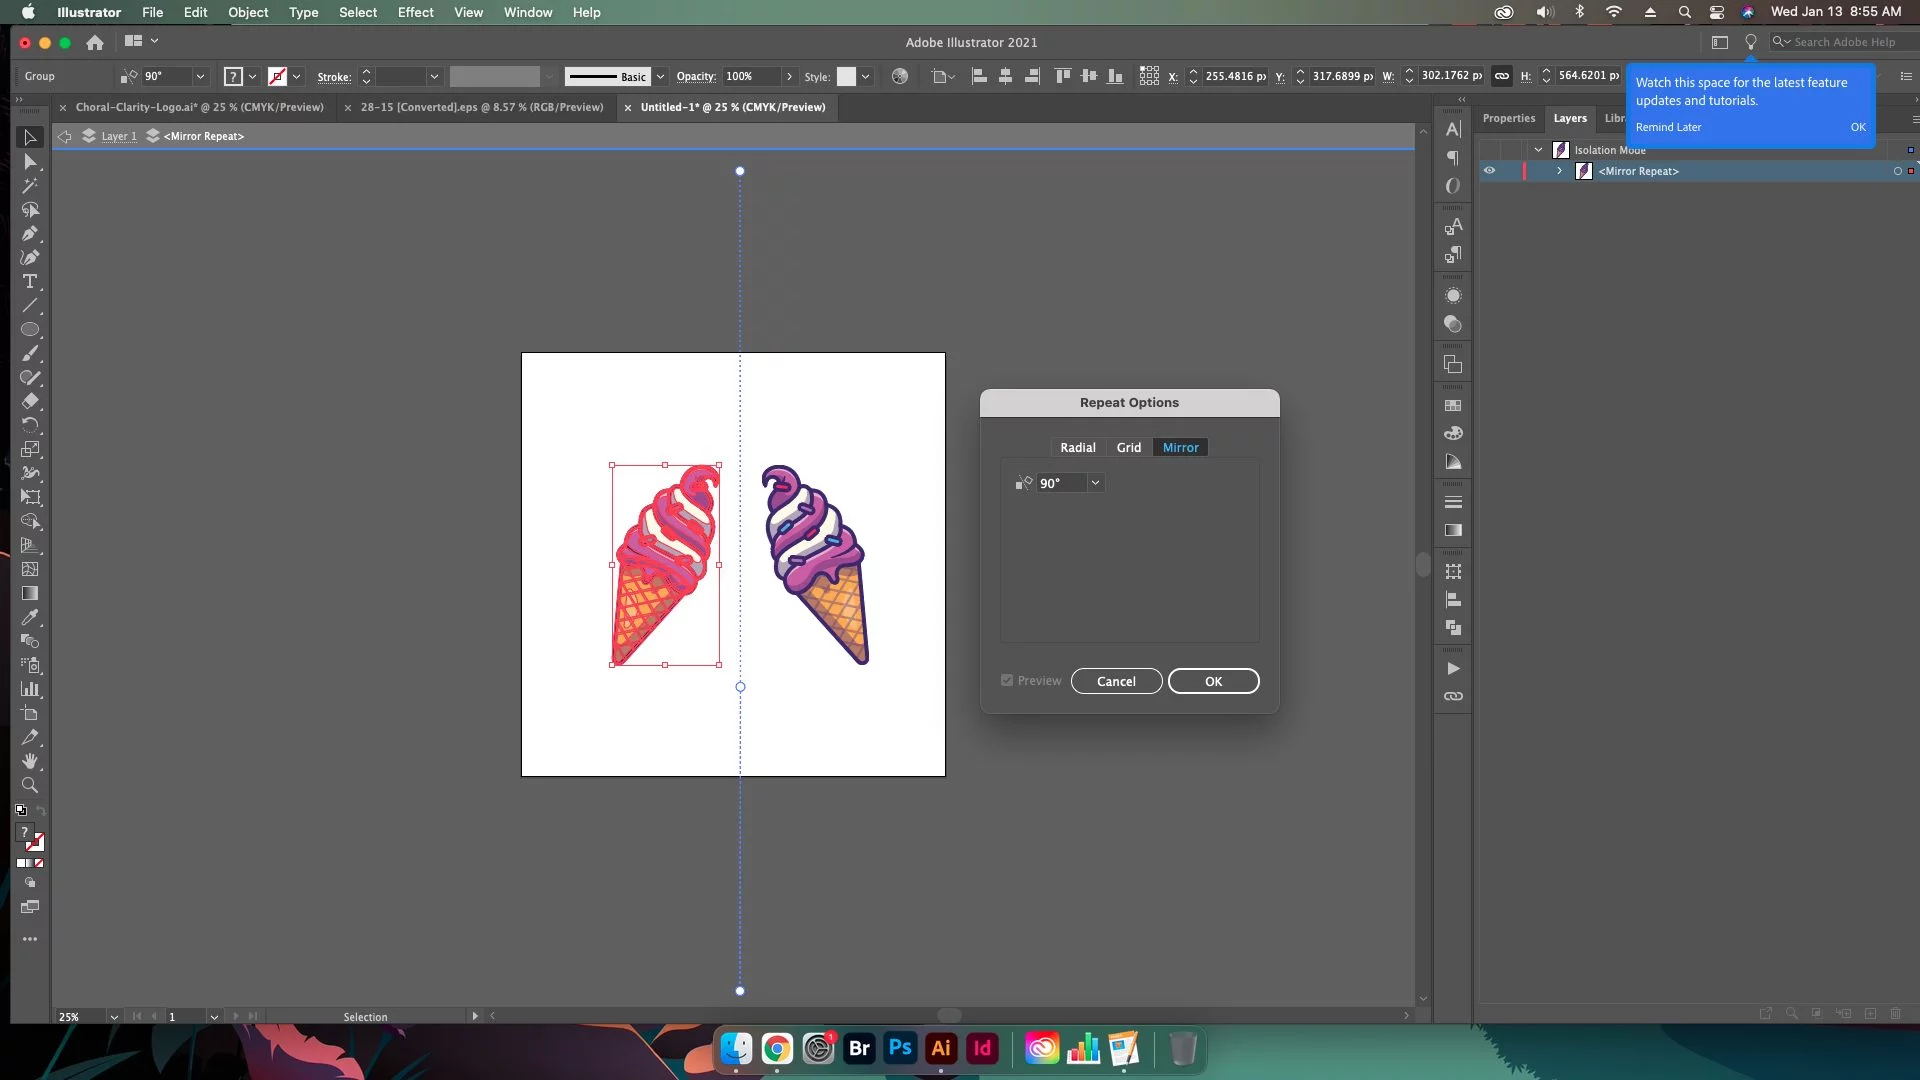
To set up mirror repeat options and preview the effects use the following steps.
Select the repeated artwork
Choose Object > Repeat > Options. A dialog box will appear labeled Repeat Options, select the Mirror tab.
You are now given the ability to change the angle of the mirror axis. By default this angle is set to 90 degrees.
Conclusion
Radial, Grid, and Mirror Repeat options introduced in this update are extremely helpful to the modern designer. Not only saving time, but creating perfect symmetry in spacing is something that used to be more chaotic than it is now. Continuing this path for Illustrator is definitely something I look forward to with Adobe. No other major articles on the 25.1 update are needed, however Snap to Glyph did get a considerable enhancement when using angular guides.

